Blog, Destinations, North America, United States
Tips for Completing the Eagle Lake Hike in Lake Tahoe, California
Sep
Last updated on October 7th, 2023 at 02:44 pm
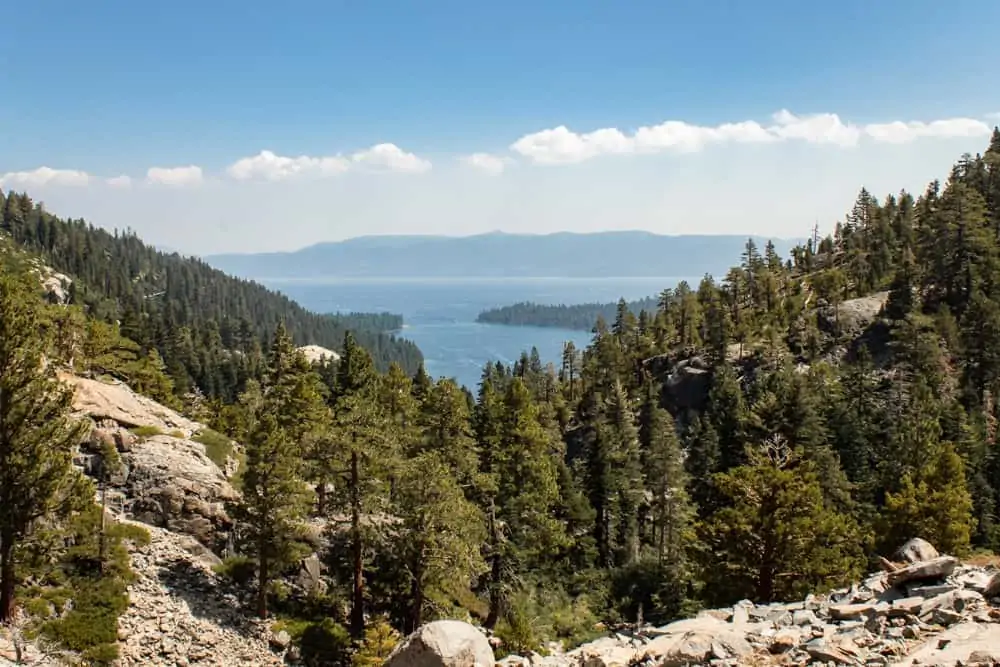
The Eagle Lake hike is an incredibly popular hiking trail near Emerald Bay and DL Bliss State Parks in South Shore Lake Tahoe. It’s popular for good reason, it’s freakin’ gorgeous! On this trail, your physical efforts will be handsomely rewarded with mountainous peaks, a waterfall, pines, and a peaceful alpine lake (if you get there early).
This hike is hands down one of the best hikes in South Lake Tahoe and it should hold a firm spot on your South Lake Tahoe itinerary.
This post contains affiliate links, which means that, at no additional cost to you, I will earn a tiny bit of income if you decide to make a purchase or booking. For more, check out my disclosure.
My Favorite hiking Resources
- Find cool hiking trails with the AllTrails app
- Stay blister free with Darn Tough socks
- All of my favorite hiking gear (boots, backpacks, water bladders etc)
- Check out my day hike packing list
An Overview of the Eagle Lake Hike
- Length: 2 miles one way, for a total of 4 miles round trip
- Cost: $5 to park in the lot directly next to the trailhead, it’s free on the side of Highway 89, and it costs $10 to park across the street at the Emerald Bay parking lot
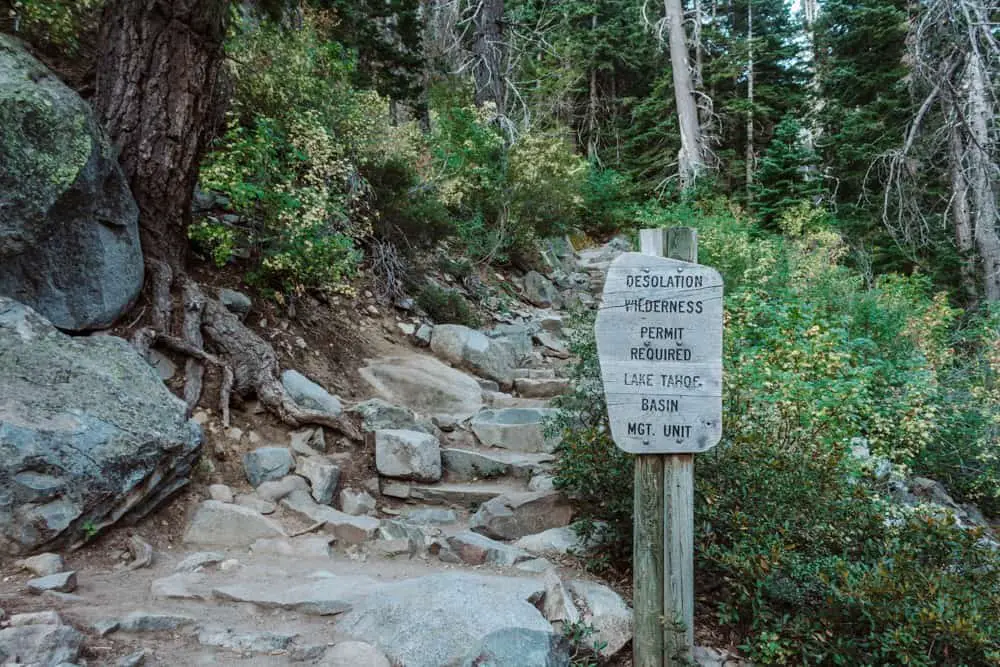
- Permit: You do need a permit as this hike is in Desolation Wilderness. You’ll pay for it upon arrival (I hiked this in August 2020 during COVID and the sign said a permit was not required)
- Terrain: Rock stairs, granite overlooks, a bridge, shaded in some locations, completely exposed in others
- Difficulty: Moderate. The hike to the lake is all an incline, but it’s not particularly steep.
- Crowd level: heavily trafficked

Where is Eagle Lake Trail Located
The Eagle Lake Trail begins just after the Eagle Falls hike. You’ll find the Eagle Falls trail on Highway 89 just across from Emerald Bay. You’ll see plenty of signs for it on Highway 89, so it’s hard to miss!
There are 3 options for parking and I strongly suggest getting there early as all of the parking lots fill up quickly. Plus, if you want to enjoy the peace and quiet of this Alpine lake with only the sounds of chirping birds and the wind rustling through the pines, you have to get there early. I don’t care if you’re not a morning person, for this hike, become one.
If you get there early enough, you can park in the lot directly next to the Eagle Falls Trail. It costs $5 to park here and there are about 15 spots.
I arrived at the parking lot just after 7:00 am on a Wednesday at the end of August and there were only 3 parking spots open and hikers were already heading to the trail.
The second option, which I chose, is to park for free on the side of Highway 89. When I arrived, there were about 6 other cars there and when I returned around 2:00 pm it was packed and people were waiting on the highway in hopes someone would be leaving!
The third option is to park across the street at Emerald Bay which costs $10. This parking lot is also where you can find one of the trailheads for the equally popular hiking trail, the Rubicon Trail. There is a pedestrian path to help you safely walk the side of Highway 89 to the trailhead.
Just look both ways before you cross!
Eagle Lake Hike in Desolation Wildnerness
Eagle Falls Hike
Once you park your car head to the Eagle Falls trailhead.
If you arrive before the ranger, it’s an honor system to pay your parking fee and collect your permit for Desolation Wilderness. As I stated above, there was a sign that said due to COVID-19 permits were not required. This may change when you hike this trail.
You’ll notice that there is a loop at the beginning of the trail, you can go left or right, I went left.
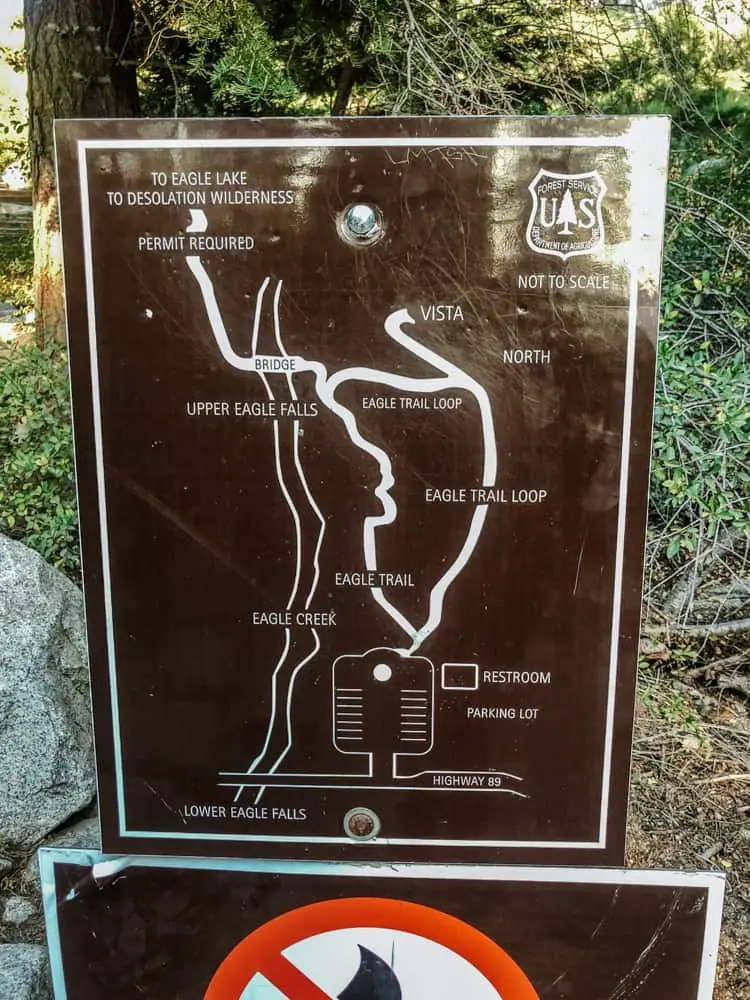
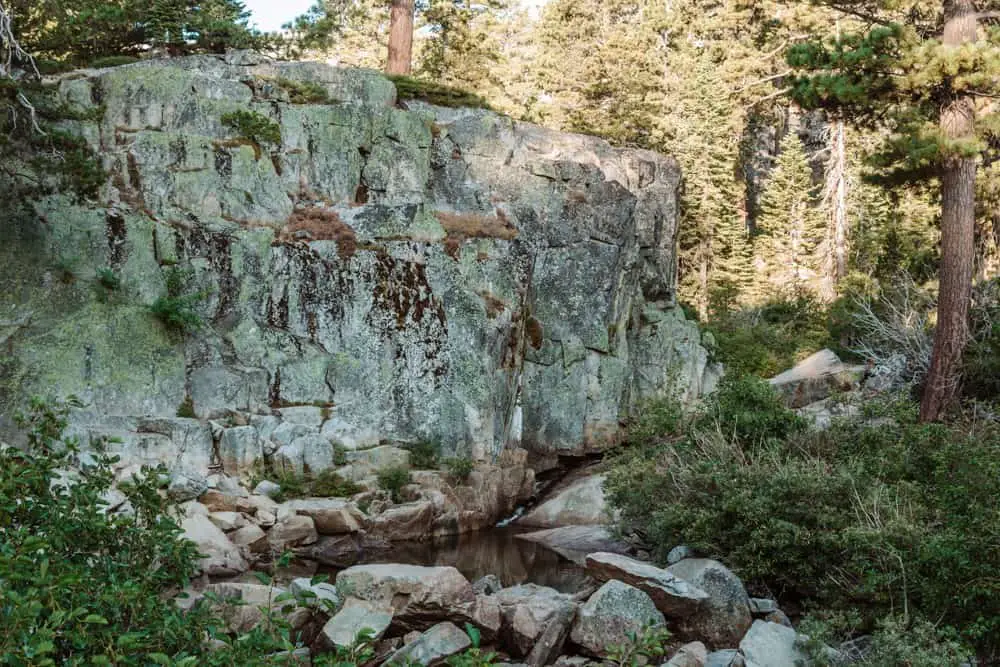
Either direction will bring you to Upper Eagle Falls which in the Spring and early Summer is an incredibly powerful waterfall. In late August when I hiked it, however, it was more of a trickle.
Although this does mean that you can swim in the pool beneath the waterfall if you choose, there were plenty of people doing that on my return to the car.
Eagle Lake Hike
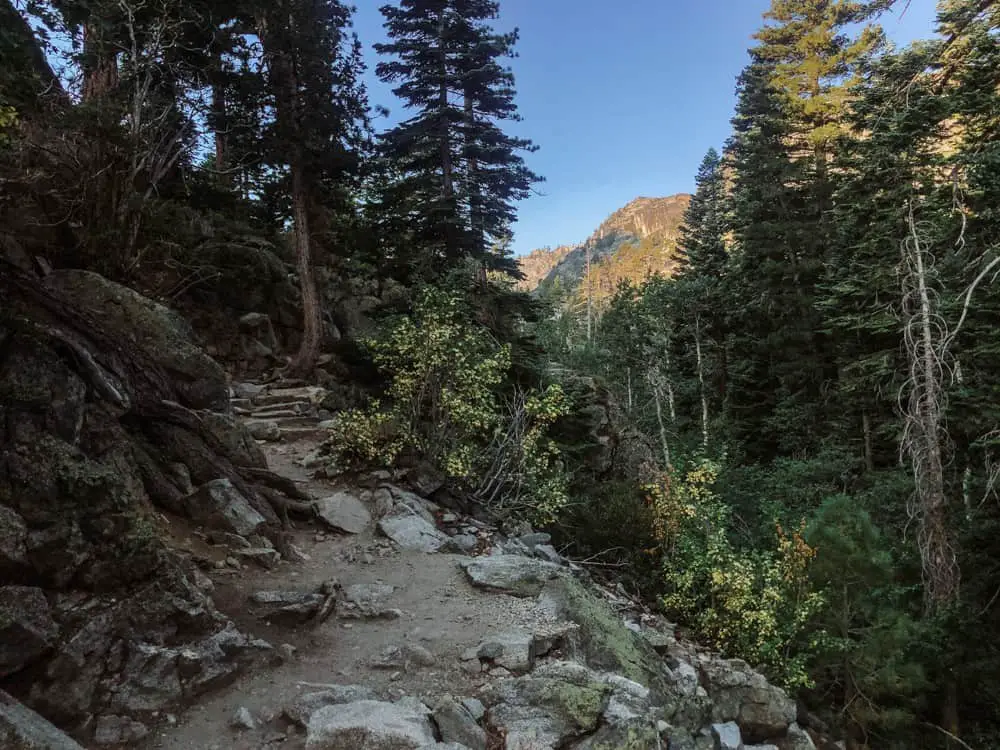
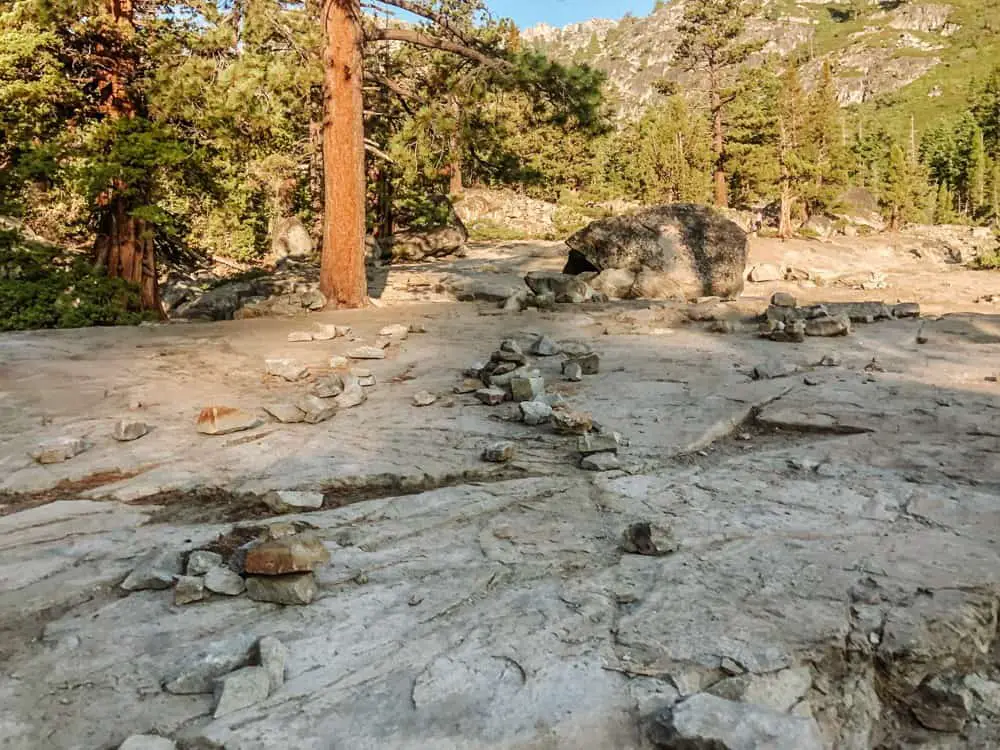
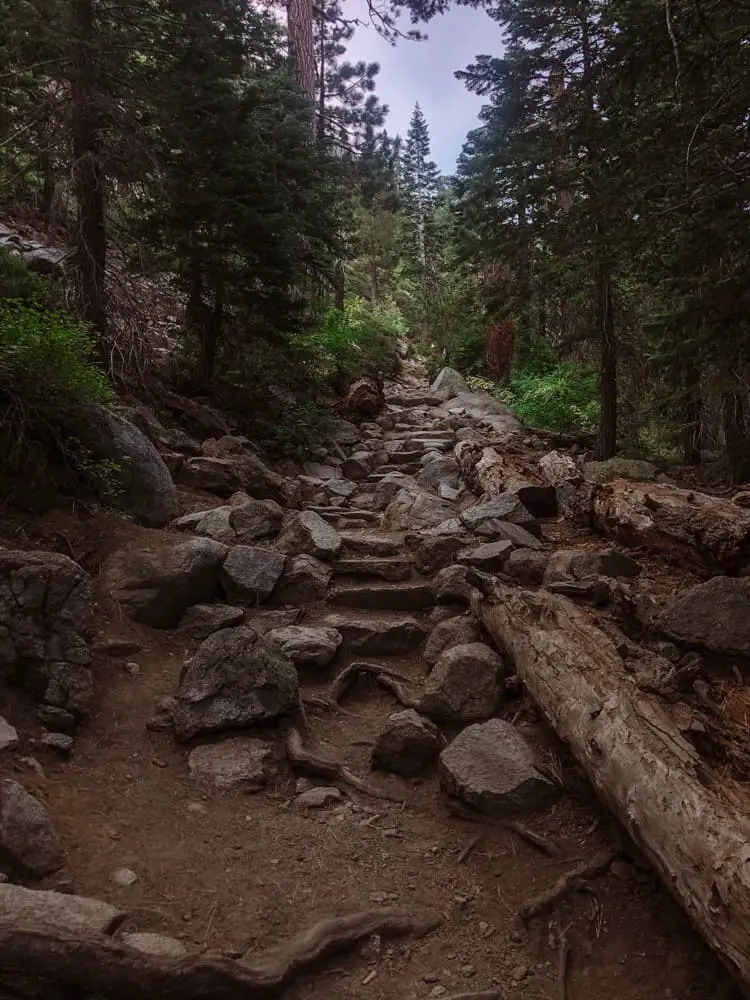
Continue on the path beyond the Eagle Falls bridge where you’ll enter a forested area and begin climbing up stairs that have been cut into the rock. After a bit of a climb, you’ll walk onto a huge expanse of granite rock.
Here the trail gets a bit tricky and I tried to keep the family in front of me within view.
However, if you stick to the left you’ll stay on the trail. I promise, if I can do it, so can you.
Just beyond this, you’ll see the Desolation Wilderness sign, which is the area you need a permit for. I’m not sure why, but when I saw it, it filled me with a foreboding feeling, but this place is anything but desolate. You’ll soon come to find that out.
The trail will continue uphill and you’ll be guarded by large trees and mountain tops. It’s gorgeous. Make sure you have plenty of space on your camera because you’ll want to take many photos.
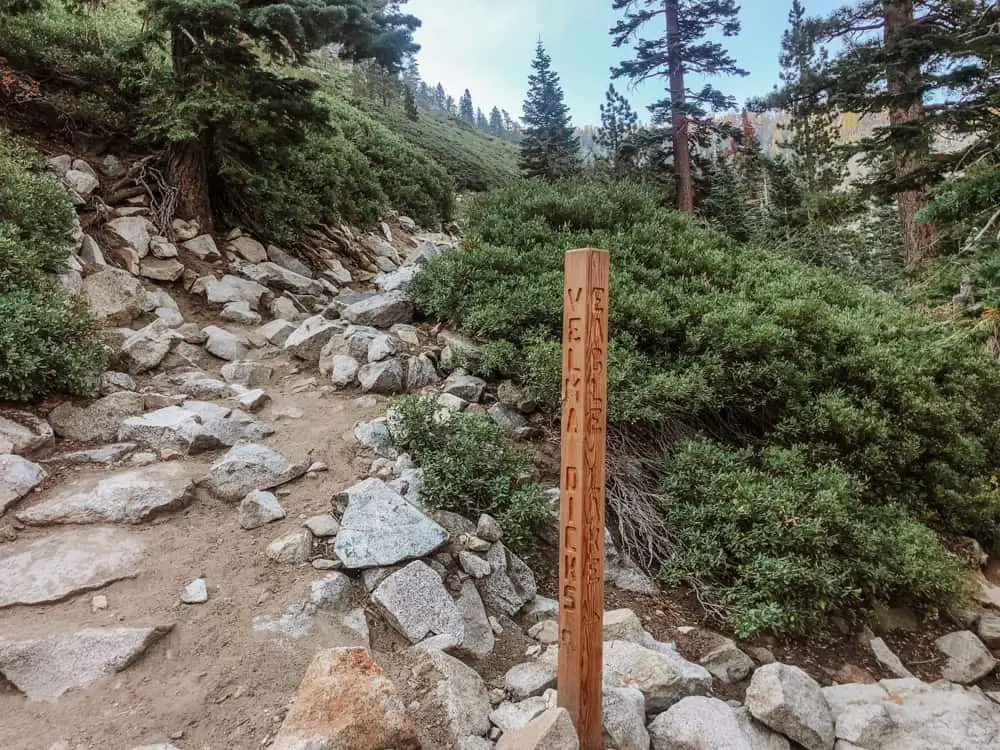
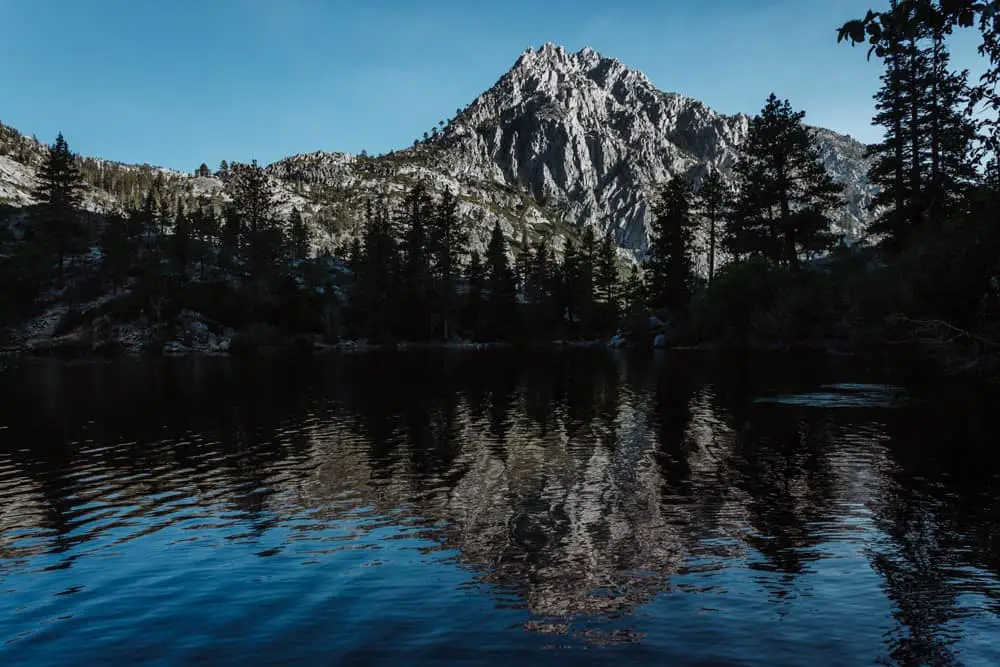
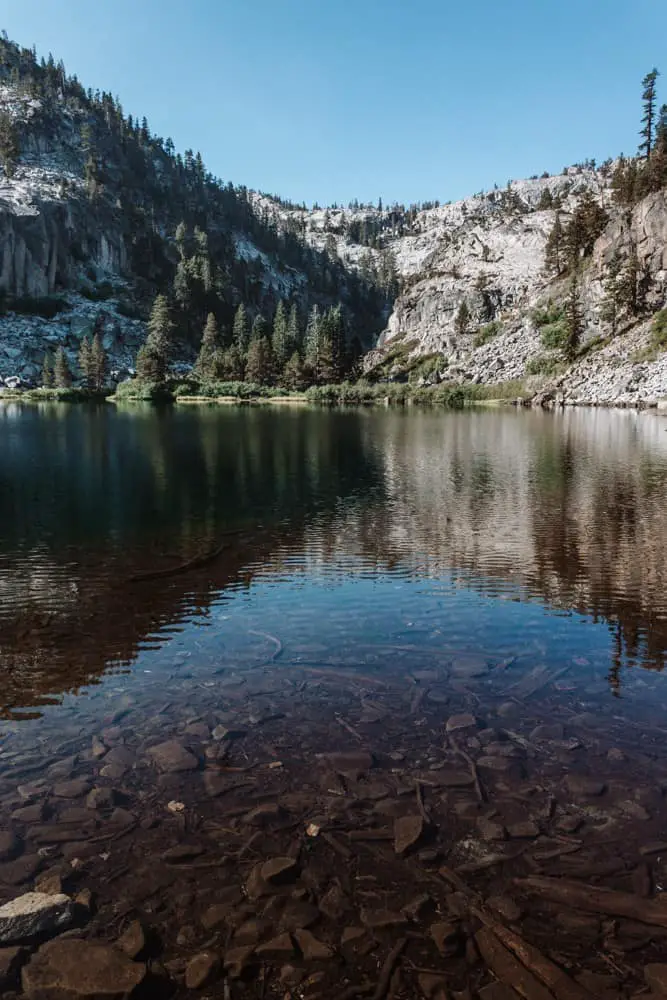
After almost 2 miles, you’ll see a signpost for Eagle Lake, follow it to the right and as you climb over a few boulders Eagle Lake will come into view.
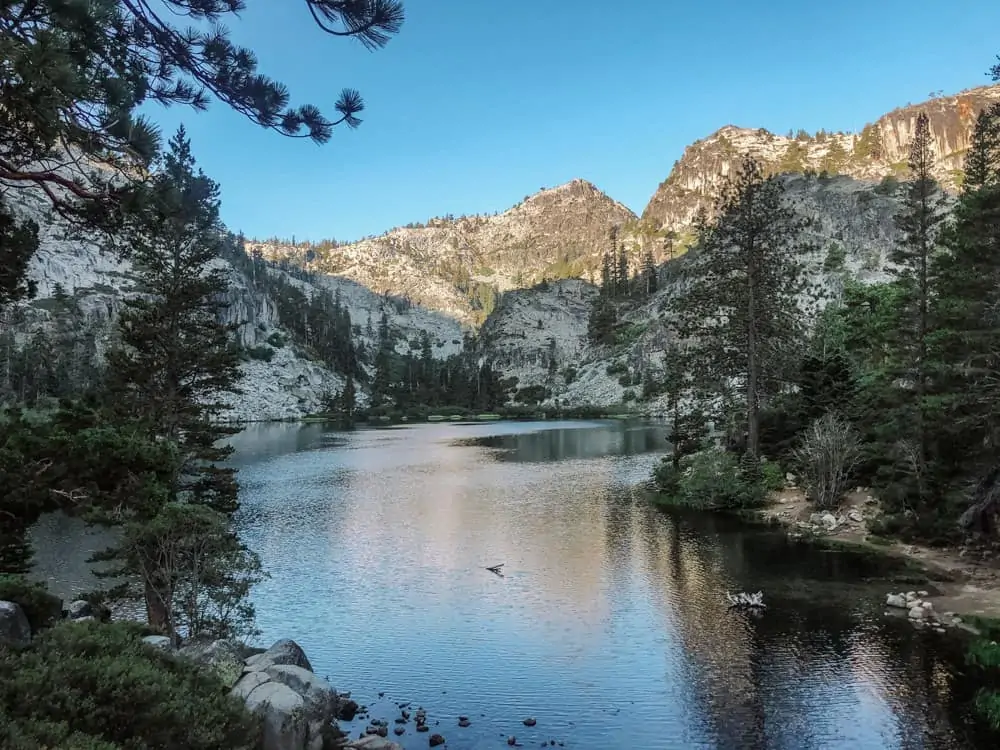
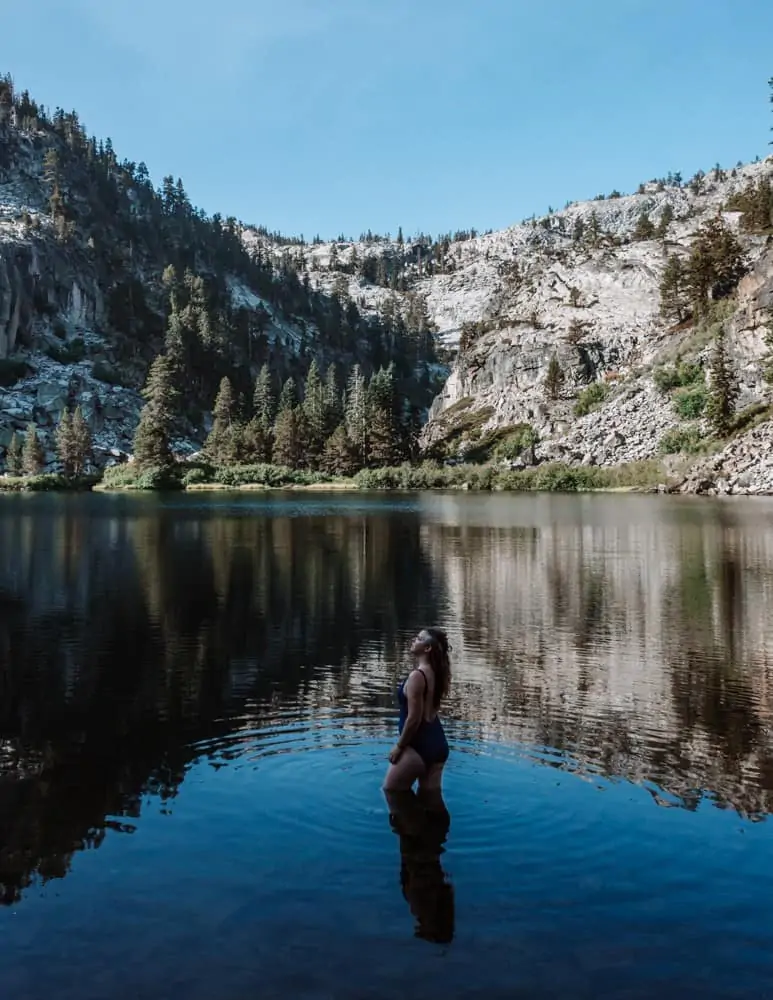
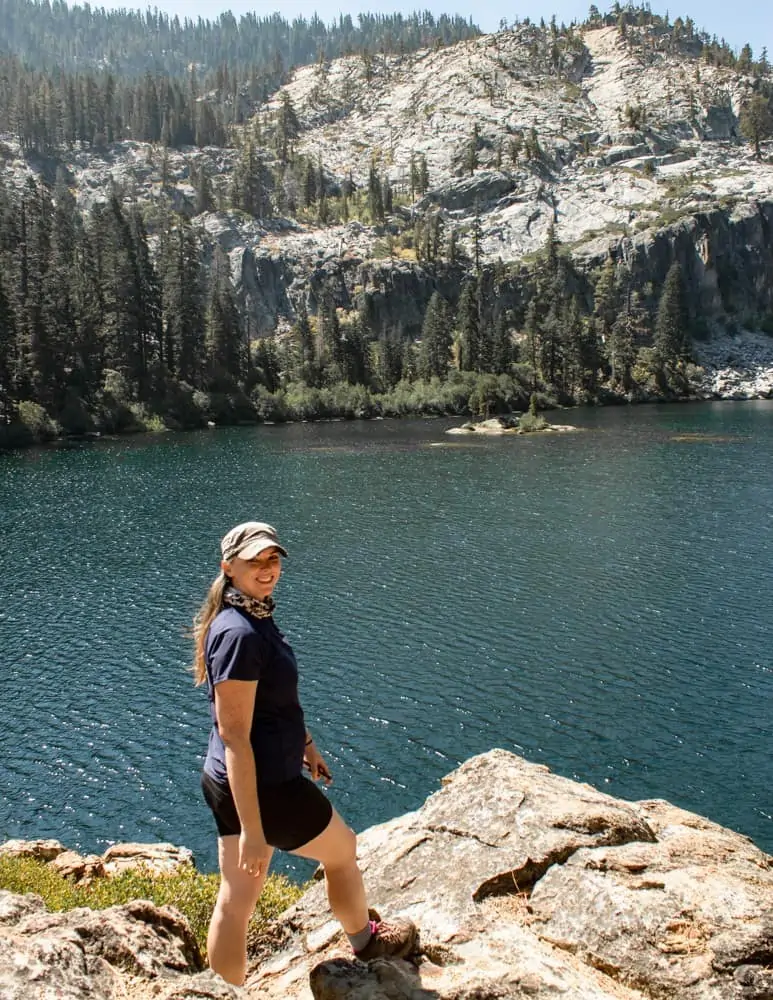
Eagle Lake
The only thought in your mind at this point will be some version of “Wow”.
This is where many people stop and as the hours pass this area will get very crowded.
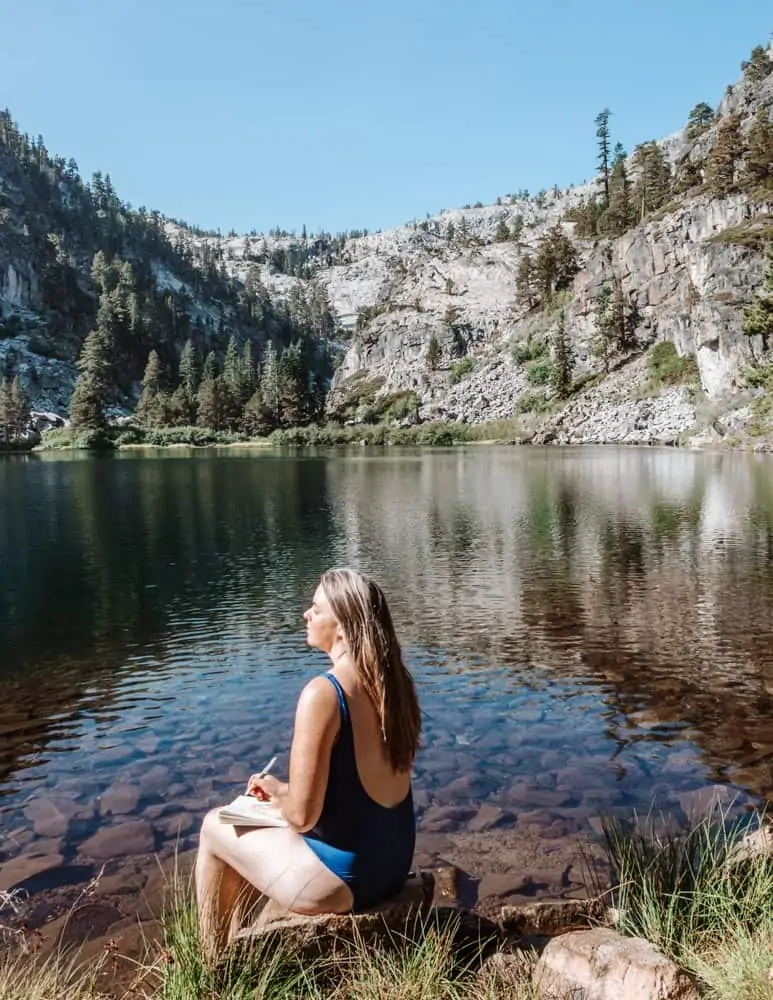
However, there are paths to the right and left of the lake. While you can’t walk around the entire lake, if you walk to the left or right far enough, you’ll soon leave the crowds behind.
I walked a bit of the trail to the left and it was pretty overgrown and narrow. I walked through too many spiderwebs for 8:00 am, but ultimately I found a path that led to the water and took a ridiculous amount of photos.
This is a great location to practice your landscape photography. Plus you’ll get the reflection of the mountain and trees in the calm early morning lake water.
After exploring the trail to the left, I returned to the main “entrance” of the lake and noticed there was also a path to the right.
I decided to see what laid beyond to the right.
This side was pure heaven.
Walk the trail to the right until you get to a large fallen tree, which is as far as you can go.
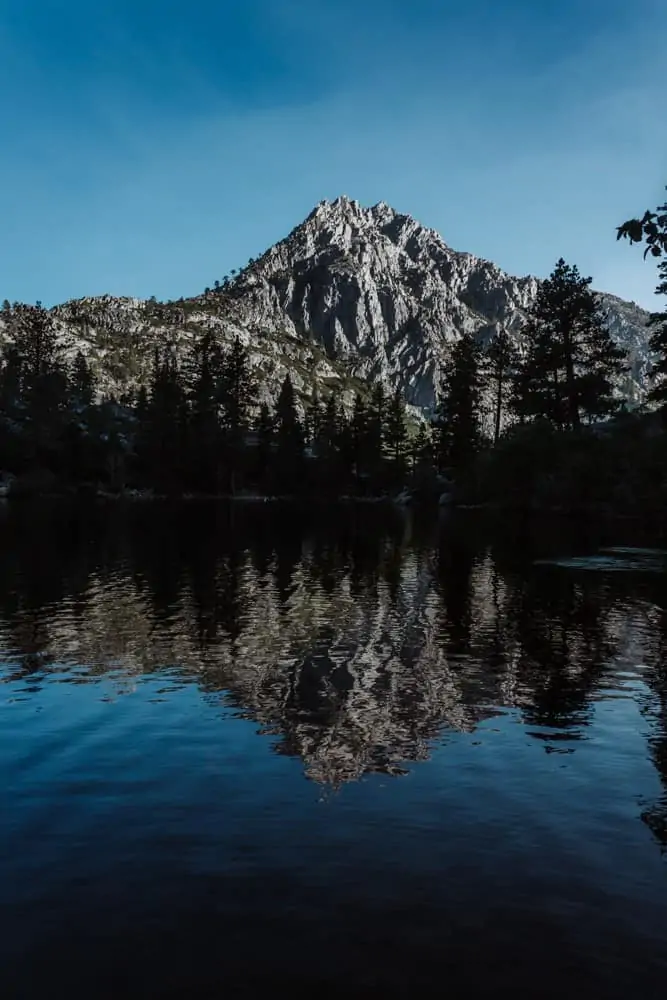
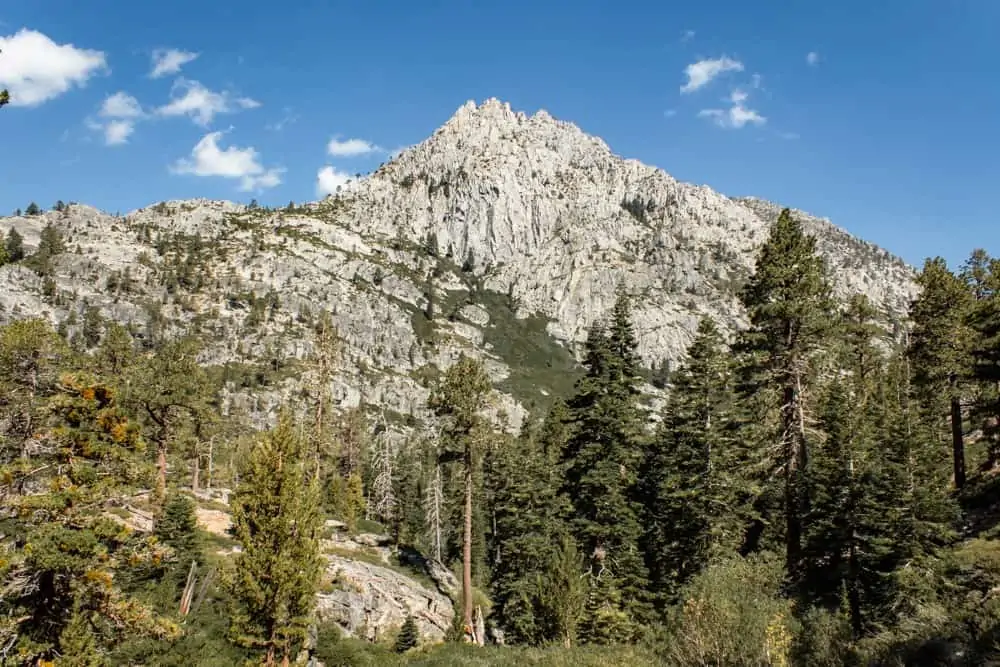
Here you’ll find plenty of space and a few rocks to sit on underneath North Maggies Peak.
I relaxed in this spot for almost 3 hours! I swam, read, journaled, meditated, ate, and enjoyed the sun warming my skin as it rose over the mountains.
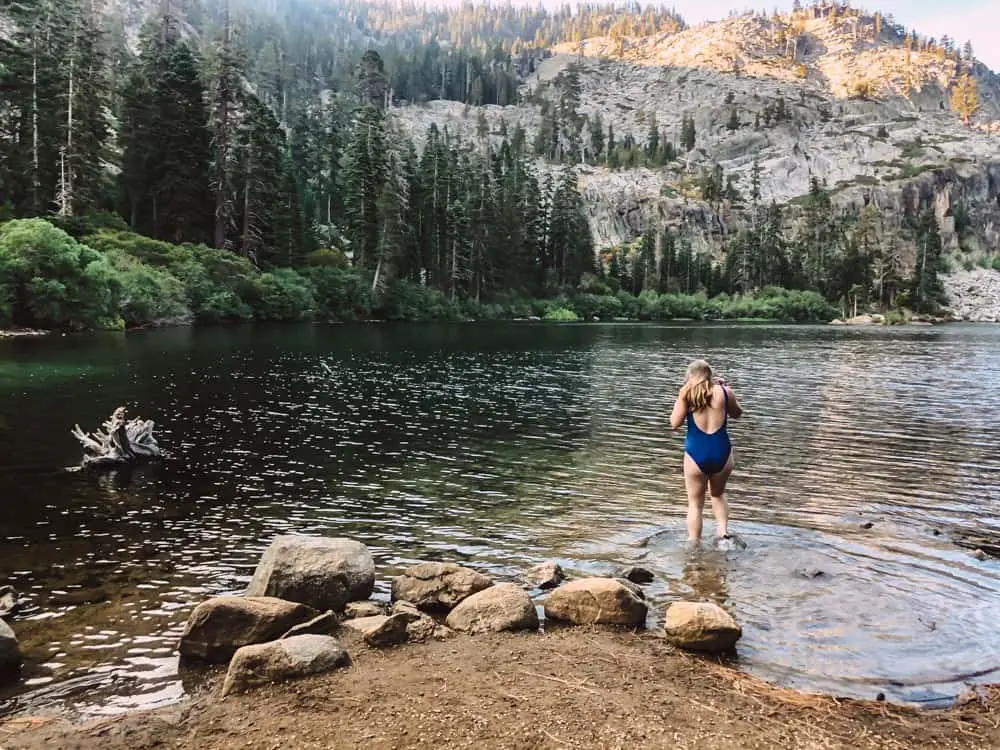
To swim or not to swim, how is that even a question?!
Now, the water is very cold. But it is so refreshing and almost felt purifying to take a swim in the icy waters just as the day began. Especially after a sweaty hike!
It felt even more magical to let the sun dry my skin as I perched on a rock to eat me my snacks.
Only 2-3 people came my way during this time and they did not stay for long.
Around 10:30 another solo female hiker passed by, also in search of solitude. She mentioned to me that it was incredibly crowded at the “entrance”. Had she not told me, I wouldn’t have thought anyone was even remotely close by, let alone a crowd of people!
So if you do happen to sleep in and arrive to find a large, loud crowd, just walk to the right and you’ll be rewarded by the peaceful lakeside moments you were hoping for when you started this hike!
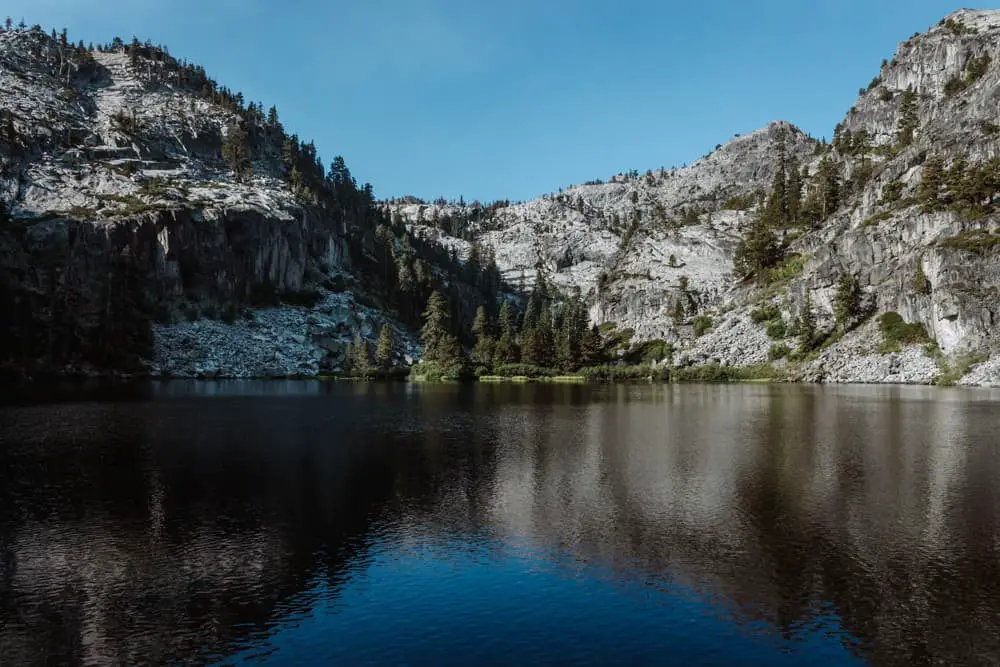
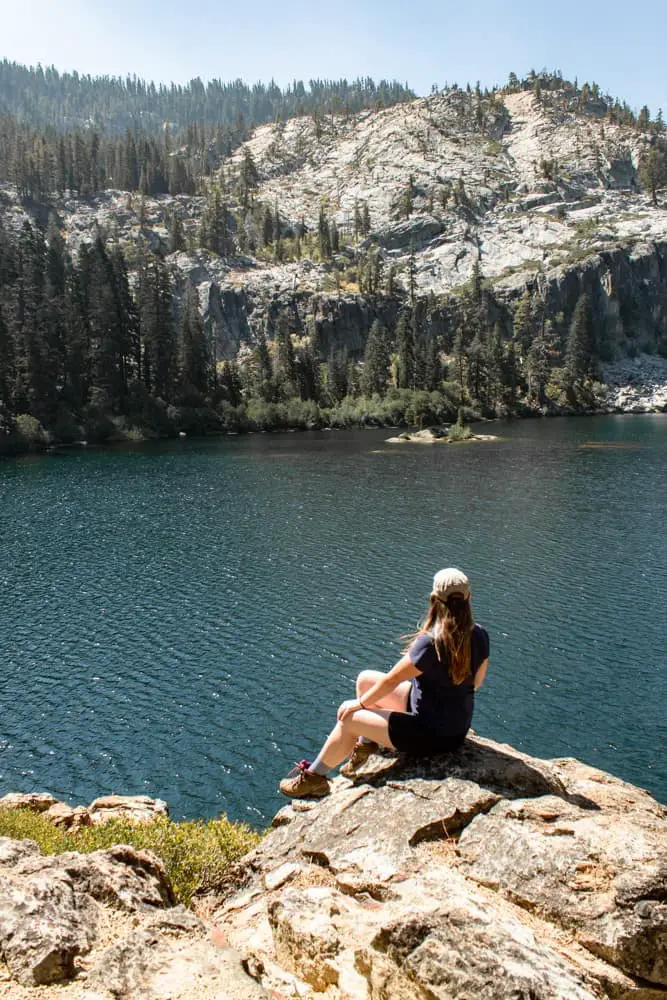
Once you’re done, begin walking back towards the entrance, but before you cross the creek you’ll notice a trail that climbs up the side of the mountain. Follow this for an overlook of Eagle Lake.
I also believe you could camp here if you’d like as when I first arrived a guy was coming down from there with a very large backpack.
This is another great location for a few photos of the lake.
Once you’ve soaked in all that your mind can handle of this gorgeous area, begin the downhill climb back to your car.
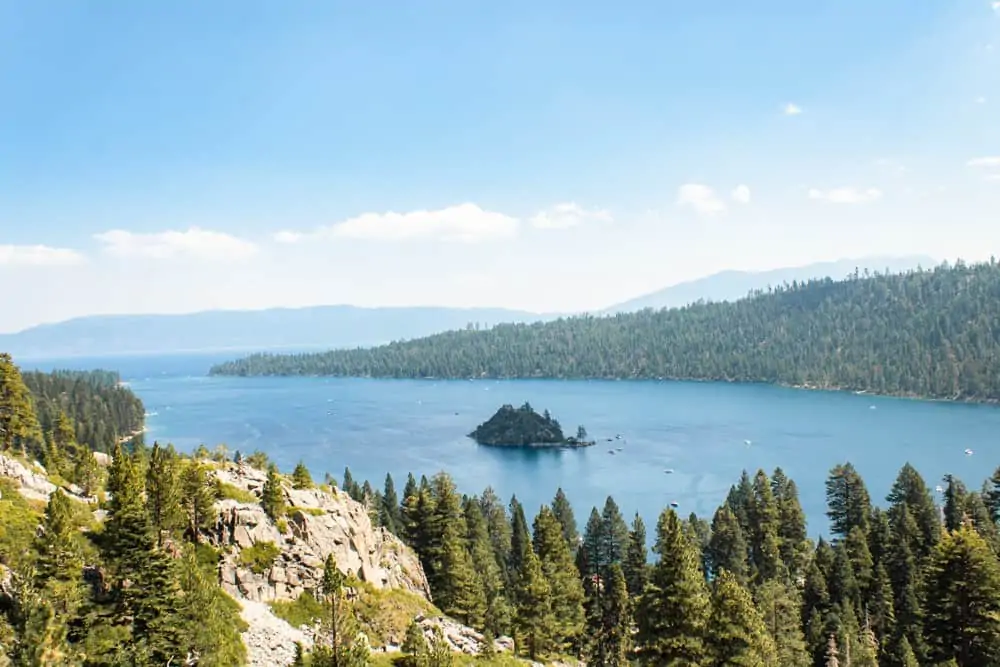
On the way back down, take a break at the large granite slab you got lost through just a few hours earlier and take in the views of Emerald Bay and Lake Tahoe below you.
Considerations for the Eagle Lake Hike
Difficulty Level
I would say this is an intermediate or moderate level hike. You don’t have to be in awesome shape to do this hike, but it is a bit like nature’s Stairmaster.
Keep an eye out for tripping hazards from the rocks underfoot!
Eagle Lake Altitude
South Lake Tahoe and Emerald Bay are just over 6,000ft above sea level which means you might notice difficulty breathing, a slight headache, and perhaps some digestive issues if you’re visiting from sea level.
Take it slow, stay well hydrated, and take breaks often.
You’ll have a roughly 400ft elevation gain during this hike.
Use a Navigation System
I will say, this trail is not very clearly marked. Many people, including myself, were confused when they reached the large granite slab. Especially if they wandered around it to take photos of the epic view.
I suggest using the AllTrails Pro app which will allow you to download the hike offline as well as track the hike.
That being said, there will likely be other people around, so you could always ask which way to go, or just follow the crowds!
What else should I bring on this hike?
You’ll want to bring everything that is on this short hike packing list, but just to give you a quick overview:
- At least 2L of water
- Snacks
- Trash bag to bring any wrappers/trash out with you
- Sunscreen
- Bug repellent
- Camera with plenty of space
- Journal if that’s your thing
- Towel
- Water shoes
- Swimsuit
- Dry sports bra/underwear
Are there bathrooms?
Yes, there are bathrooms at the trailhead, but they reek. I opened the door to use one and just decided to hold it.
I did pee on the trail to the right of the lake because no one was around!
What to Wear on the Eagle Lake Hike
What you wear on this hike will depend on the time of year you plan to hike it and the weather on the day of your hike.
I hiked the trail in late August when the high was 80*. I wore these awesome shorts from Athleta (no chafing) and this lightweight shirt from Athleta as well.
Underneath I wore a swimsuit because I knew I’d go for a swim. Since I knew I’d be swimming I also packed this lightweight towel to help dry off.
On my feet were my tried and true Darn Tough hiking socks, which NEVER give me a blister, and my Keen waterproof hiking boots.
I recommend a hiking boot or trail runners for this hike. I also brought with me water sandals because the bottom of this lake is very rocky. It made my walk into the chilly waters just a tad more graceful, and much less painful.
I wore a buff for sun and COVID protection, a hat, and plenty of sunscreen.
Animals on the Trail
This is bear territory, so make sure that you take any food out that you brought with you so that they don’t come looking for snacks. If you need to throw anything away while you’re on the trail, wait until you return to the parking lot and use the designated trash cans.
There are also lots of chipmunks, please do not feed them.
Leave no Trace
In the same respect, follow the leave no trace principle. Anything that you brought with you on the hike, take with you as you go.
Consider leaving the trail even better than you found it by picking up any trash others may have left behind.
I seriously hope that you add the Eagle Lake hike to your Lake Tahoe bucket list. It’s one of the top hikes to do in Lake Tahoe and I guarantee you’ll enjoy it if you follow the tips in this post! I’d love to hear about your experience in the comments!
If you’re looking for other hikes in California, check out these posts!
Awesome Hikes in Half Moon Bay California for Coastal Views and Redwood Forests
The Best Ocean View Hikes in Pacifica, California
The Best Hikes in Pinnacles National Park
3 of the Best Hikes in Joshua Tree National Park for Casual Hikers
Like this post? Pin for later!