
Blog, Destinations, Ecuador, South America
How to Visit the Galapagos on a Budget: Complete Itinerary
Feb
Last updated on February 27th, 2024 at 12:58 pm
I remember riding a bus home from a work trip in the middle of winter. I listened to a podcast about the Galapagos Islands as I gazed out over the piles of white snow. The podcast made it sound like it was so far away, filled with exotic wildlife and dangerous volcanoes that only the lucky few would ever have a chance to visit. Fast forward three years, I was traveling to Ecuador and discovering how to visit the Galapagos on a budget.
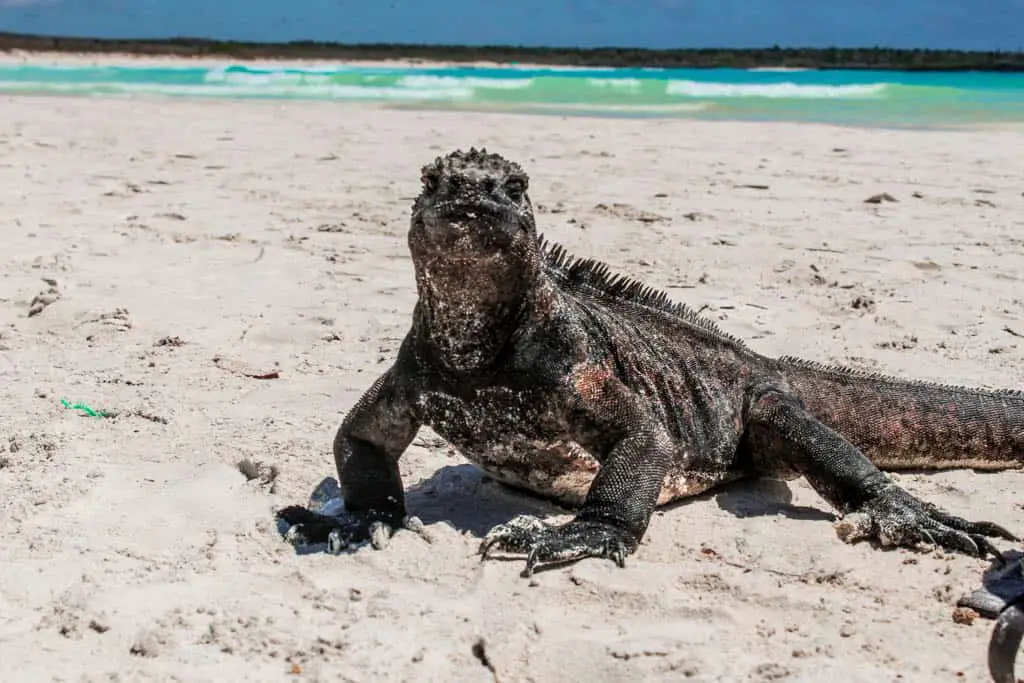
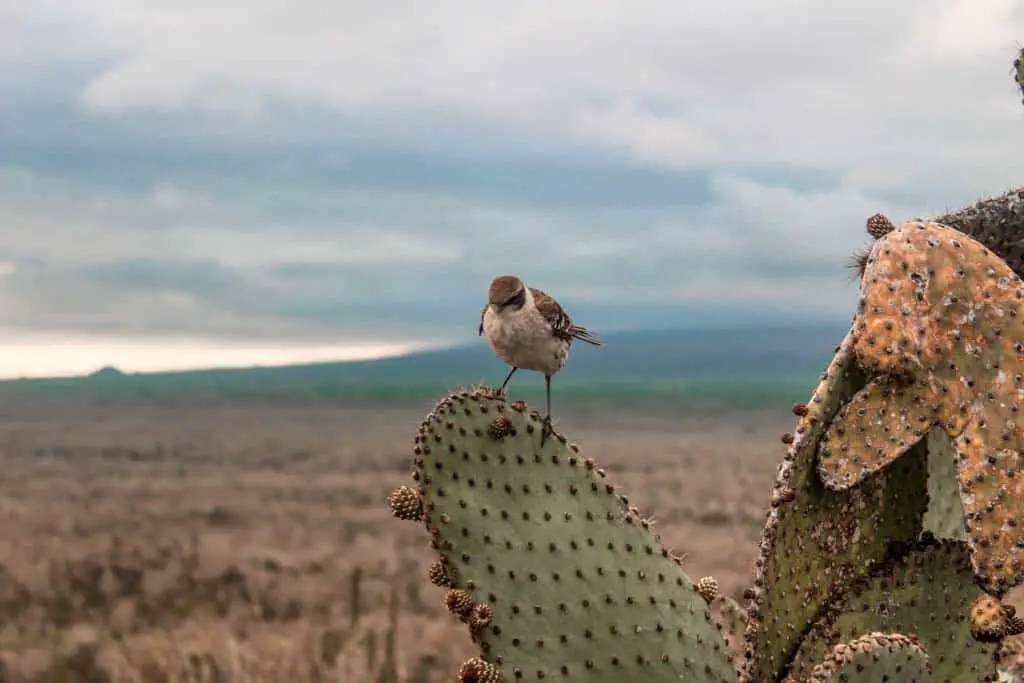
In the vastness of the Pacific there’s a place unlike any other: enchanted volcanic islands that are home to a remarkable collection of animals and plants. Here, evolution is proceeding with spectacular speed. Black lizards that swim in the oceans and spit salt from their noses. Penguins thousands of miles from Antarctica. And an abundance of unique plants. (Animals & Galapagos)
– David Attenborough’s Galapagos: Origin
All of my research led me to one conclusion: I can’t afford to go.
After quitting my job to travel for a year, I found myself living in Quito, Ecuador without a steady income. While I was physically closer to the Galapagos, even a last minute cruise was financially out of reach. Inevitably, the Galapagos was placed on the back-burner.
One day, on an intense Instagram scroll, I noticed a friend from college posting her Galapagos adventures. I reached out to her and discovered it’s actually possible to explore the Galapagos without a cruise!! Back to Google I went!
Not so surprisingly, many blogs and guidebooks focus on cruises, only mentioning the possibility of DIY-ing it. After quite a bit of digging, I found some reputable blogs filled with tips for planning a DIY trip to the Galapagos!
I went for it!
As it turned out, there were more people than I thought traveling to the Galapagos on a budget. Once on the islands, I met many people who opted out of a cruise or a land-based tour and instead planned their own itinerary.
Of course, there are pros and cons to each approach to the Galapagos. For example, if you are a scuba diver, then a live-aboard cruise sounds like the way to go as it takes you to islands unreachable without a cruise. If you’re not, like me, you can still see plenty of wildlife with a snorkel and fins.
Before you even set foot on the islands, know what you’d like to do and see. Knowing where you’re willing to splurge and where you will save will help you stay on budget. So, without further ado, let’s dive into how to create an awesome Galapagos itinerary, on a budget.
This post contains affiliate links, which means that, at no additional cost to you, I will earn a tiny bit of income if you decide to make a purchase or booking.
solo female Travel Resources
- Book your flight to San Francisco with Skyscanner
- Get reliable travel insurance with World Nomads
- Find awesome accommodation with booking.com or Hostelworld
- Book your rental car with Discover Cars
- All of my favorite travel and photography gear
- Read the ultimate guide to solo female travel
Practical Tips for Visiting the Galapagos Islands
Before we discuss the best things to do on the Galapagos Islands while you’re there, let’s review some practical tips for visiting the Galapagos.
Money on the Galapagos Islands
Ecuador’s currency is the US dollar and the majority of places on the Galapagos Islands are cash only. There are only ATMs on Santa Cruz and San Cristóbal Islands and they typically have a maximum daily withdrawal of $300.
Before arriving on the Galapagos Islands, make sure you have enough cash for the first bit of your trip. Also, ensure you restock on cash before you head to more remote islands.
Galapagos Entrance Fees
There are two non-negotiable entrance fees that every visitor to the Galapagos Islands must pay.
The first is a $20 transit card that you will pay at the airport before departing mainland Ecuador. This is purchased at the airport in Quito or Guayaquil. Don’t worry, there are plenty of signs for where to purchase this card and the airlines are very familiar with the process.
The second is the $100 National Park entrance fee for foreign tourists over the age of 12. Those under 12 pay $50 and there is also a separate fee for visitors from the Andean Community and Ecuadorian citizens.
This National Park entrance fee is paid at the airport upon arrival.
Additionally, if you plan to visit Isla Isabela there is a $10 entrance fee paid on arrival.
Everything is cash only.
Inter-Island Transportation
Santa Cruz Island and San Cristóbal Island are the two main islands of the Galapagos where visitors arrive. Once you’re on one of these two islands, ferries are the mode of transportation to more remote islands.
From Santa Cruz Island you can get to Isabela Island, Floreana Island, and San Cristóbal Island. Somewhat surprisingly, travel time from Santa Cruz to each island is 2 hours.
Ferry Routes & Costs:
- Santa Cruz to/from San Cristóball: $40
- Santa Cruz to/from Isabela Island: $40
- Santa Cruz to/from Floreana: $50
There are twice daily departures from Santa Cruz to and from San Cristóbal and Isla Isabela. However, the ferry does not operate daily to Floreana Island.
The cost of the ferry is set, so no matter which tourist office you walk into to purchase, you’ll get the same price, which takes a lot of the hassle out of the budgeting process.
You may also need to pay $1.50 for the water taxi to take you to and from the port to the ferry.
Boarding the ferries is similar to boarding a flight. You’ll show up to the port, an hour before boarding, they will check your luggage to ensure nothing foreign is brought onto the next island, and they’ll call your ferry destination as boarding begins.
Island Transportation
I found the best way to get around the islands was on foot or by taxi. The taxis on the Galapagos are white pickup trucks. They’ll take you to the top tourist attractions for a negotiated price. They typically wait for you to finish at the attraction and will bring you back to town when you’re done.
The Best Time of Year to Visit The Galapagos Islands
As the Galapagos Islands are located near the equator, the weather is pretty steady throughout the year making it an awesome year-round destination. However, there are two main seasons the islands experience: the warm, wet season and the cool, dry season.
Warm, Wet Season (December to May): This period is characterized by higher temperatures and occasional rainfall. Average temperatures range from 77°F to 88°F (25°C to 31°C), creating a warm and tropical atmosphere. Although there may be some light rain, it is an excellent time for underwater activities such as snorkeling and diving when the waters are warmer.
Cool, Dry Season (June to November): During this season, temperatures are cooler, ranging from 70°F to 82°F (21°C to 28°C). The air is drier, and the sea is cooler, providing optimal conditions for land-based activities like hiking and exploring the diverse landscapes. The cooler ocean temperatures also attract marine life, making it an excellent time for wildlife enthusiasts.
Galapagos Islands Packing List
While you can read my detailed Galapagos packing list to ensure you don’t forget anything, let’s go over some of the essential items to pack for the Galapagos Islands!
- Sun Protection: The sun in the Galapagos Islands, and Ecuador in general, is incredibly strong. You’ll need a variety of quality sun protection.
- Reef Safe Sunscreen to protect your skin and the animals. I love SunBum.
- Rash Guard is essential for sun protection when you’re snorkeling in the water. The built-in UV protection will keep your back from burning while you’re playing with the seals! I love this one.
- Sunglasses: Sunglasses are essential to protect your eyes as the sun’s rays bounce off of the bright white sand and clear water
- Hat: A wide-brimmed hat will not only protect your face, but it will also protect your ears and the back of your neck. You can find some “cool” ones here.
- Swimsuits: You will likely be in the water for the majority of your trip. Pack at least two swimsuits so you can wear one while the other dries.
- Wetsuit: The water is incredibly cold. Most tour companies provide wetsuits for snorkeling excursions, however, if you’re snorkeling on your own, you may want to bring your own wetsuit. I personally didn’t but it’s up to you!
- Breathable Clothing: The weather in the Galapagos is generally warm year-round. Pack clothing that breathes, moisture wicks, and quick drying. A pair of lightweight long pants, comfortable shorts, a few T-shirts, tanks, and lightweight long sleeves would be a good starting point. A light sweater or jacket for the evenings will keep you warm as it cools off at night.
- Rain Jacket: If you’re visiting during the rainy season, a lightweight rain jacket will be helpful to have on hand.
- Walking Shoes: A comfortable pair of walking shoes or lightweight hiking boots are essential for your trip. If you’re not planning on any hikes, then a comfortable pair of sneakers will be sufficient.
- Water Sandals: A pair of Keen, Chaco, or Teva water sandals are essential for the Galapagos Islands. You’ll be navigating sharp lava rocks to reach some of the swimming spots on this itinerary. Wear them to get in and out of the water to avoid hurting your feet. I did not have these and went snorkeling in my sneakers (don’t recommend).
- Quick Dry Towel: Many day tours will provide towels, however, you’ll need one for your solo beach days. These are lightweight, packable, and dry quickly.
- Camera: You’ll want to take thousands of pictures of the wildlife on the Galapagos Islands. Whether you’re planning to use your iPhone, a fancy camera, or a GoPro, make sure you have plenty of storage space, extra memory cards, and all charging cables.
- Dry Bag: A dry bag comes in clutch for keeping your electronics (and cash) dry when you’re near water.
- Insulated Water Bottle: An insulated water bottle like a Hydro Flask will keep your water nice and cold when you’re out on your adventures. They make a lighter-weight one now that is intended for hiking. Check it out here.
- SteriPen/Water Treatment: The water in Ecuador and the Galapagos Islands is not potable. Use a SteriPen, or other form of water filtration system, to clean the water before drinking it.
- Medications: Ensure that you have any prescription medications you may need to last the entirety of your trip (and then some). Also pack Immodium (just in case), and Dramamine if you’re prone to motion sickness (ferry crossings could cause problems).
- Travel Documents: Ensure that you have your passport, your transit card, and plenty of cash! Also don’t forget your travel insurance!
Overview of the Galapagos Budget Itinerary
To get to the Galapagos, I first flew from the States to Quito, Ecuador. I spent two days in Quito, before heading off to the islands. In total, I spent 10 days and 9 nights on the Galapagos. I visited Santa Cruz, Isla Isabela, and San Cristóbal, in that order. Here’s how that travel looked:
- Fly from Quito to Baltra Island (Santa Cruz). This included a 30-minute layover in Guayaquil, where I did not get off of the plane.
- 3 nights, 3.5 days on Santa Cruz
- Ferry to Isla Isabela
- 2 nights, 2 days on Isla Isabela
- Ferry to Santa Cruz
- 1 night, .5 day on Santa Cruz
- Ferry to San Cristóbal
- 3 nights, 3.5 days on San Cristóbal
- Fly from San Cristóbal to Quito – this was a direct flight
- .5 day on San Cristóbal prior to the flight
While I share where I stayed on each of these islands, read this detailed post for where to stay in the Galapagos.
The Ultimate Galapagos Itinerary on a Budget
The following itinerary follows the above overview. We’ll cover the best things to do on the inhabited islands of Santa Cruz, Isabela, and San Cristóbal so that you can build your bucket list Galapagos Islands itinerary.
While I do include the cost of activities, please do your research as they may have changed.
Santa Cruz Island Itinerary
Once you land at Baltra Airport on Santa Cruz Island, you need to make your way to Puerto Ayora, the island’s main town. It takes about an hour to get there from Baltra airport.
Getting to Puerto Ayora
After exiting the airport, take the bus to the ferry (this is free). Honestly, don’t try to rush to the first bus, they’ll be packed, so it’s better to wait a bit for the crowd to clear.
The bus takes you to a taxi boat. It is then a $1 taxi boat ride across the channel, which is about 10 minutes.
From there take a taxi into town. for $25 my taxi driver took me directly to my hotel. There are buses that will take you into town for much cheaper, but the bus wasn’t there and I was impatient!
Cost of transport from Baltra Island to Puerto Ayora: $26
Where to Stay on Santa Cruz Island
Hotel Brisas del Pacifico: I spent three nights in Santa Cruz at Hotel Brisas del Pacifico. In total, it cost $80 for a private room with a private bathroom. While the hotel is about a 10-minute walk into the center of town, I found it safe and clean. The hotel is located directly next to a market so it was a bit noisy in the mornings, but it was a great place to pick up fresh fruit for the day on my walk into town.
Check rates and availability here.
Hostal Gardner: A few days later when I returned to Santa Cruz for one night, I stayed at Hostal Gardner two blocks away from the pier. I had a 4-bed dorm with a bathroom and breakfast for $20/night.
Check rates and availability here.
Cost of 4 Nights Accommodation on Santa Cruz: $100
Puerto Ayora Day Trips
There are so many day trips you could do from Puerto Ayora. In fact, you could base yourself on Santa Cruz for the entirety of your trip, paying for day trips off the island each day. You could even find last-minute cruises from the tourist shops that are deeply discounted as they need to fill up the ships!
I opted not to do any booked tours on Santa Cruz. There were two tours I wanted to do on Isabella and San Cristobal, so I allocated my funds to those! There are plenty of free (or inexpensive) things to do on Santa Cruz.
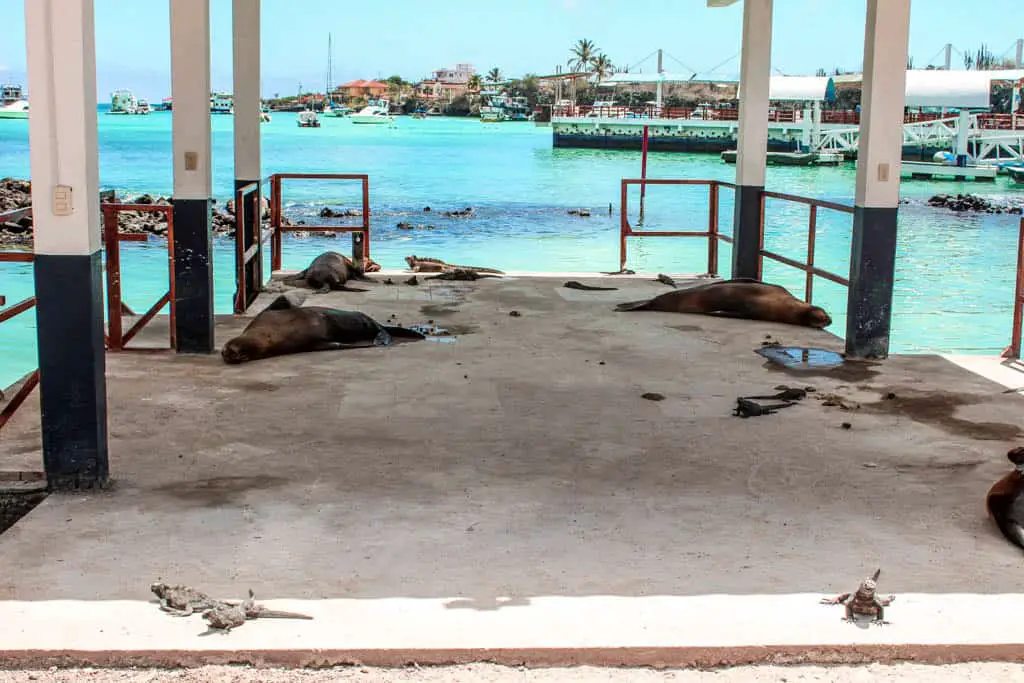
Explore Puerto Ayora
Spend a day wandering Puerto Ayora. I recommend walking along Avenida Charles Darwin.
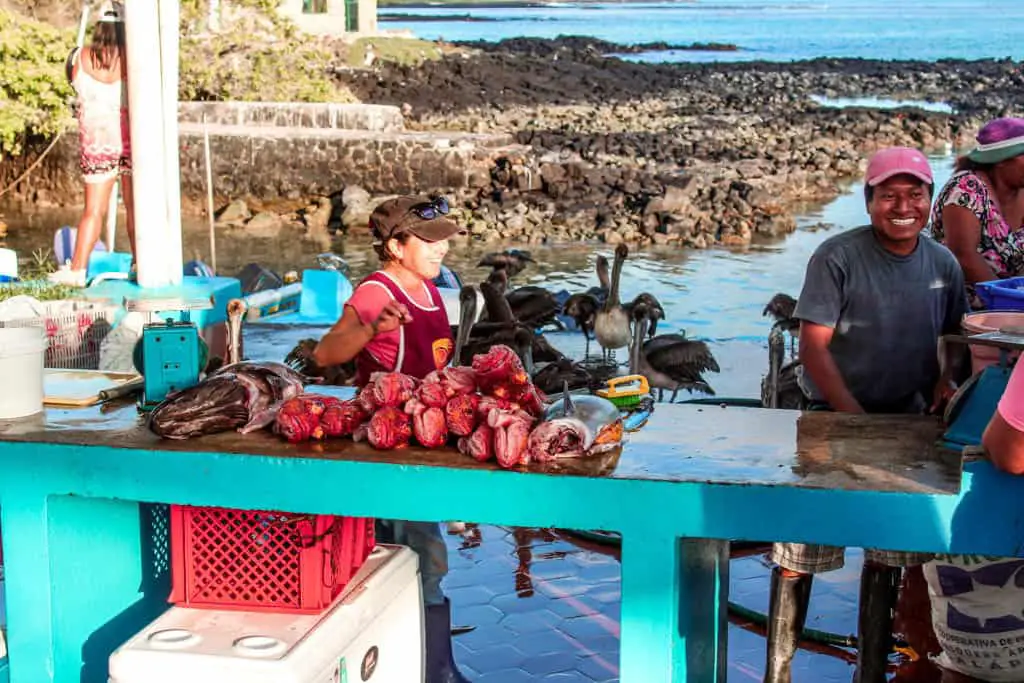
Along this street is the Galapagos fish market, where fishermen bring back their daily catch for cleaning. It’s quite the sight to see as pelicans hang around hoping to catch some scraps! Definitely worth observing the interactions here for a bit!
Continue along Avenida Charles Darwin for about 20-30 mins for Playa de la Estacion, the closest beach to town. It’s a small, pebbly beach, but you can dip your toes in the chilly water, relax, and see wildlife.
In town there are also plenty of cafes and restaurants to relax in.
Charles Darwin Research Station
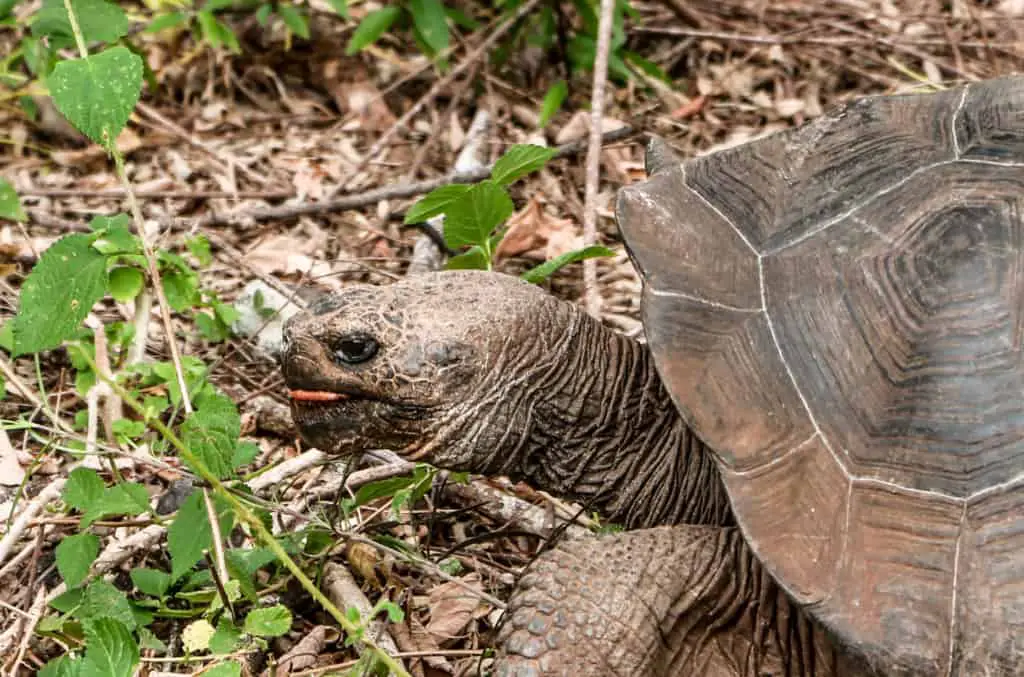
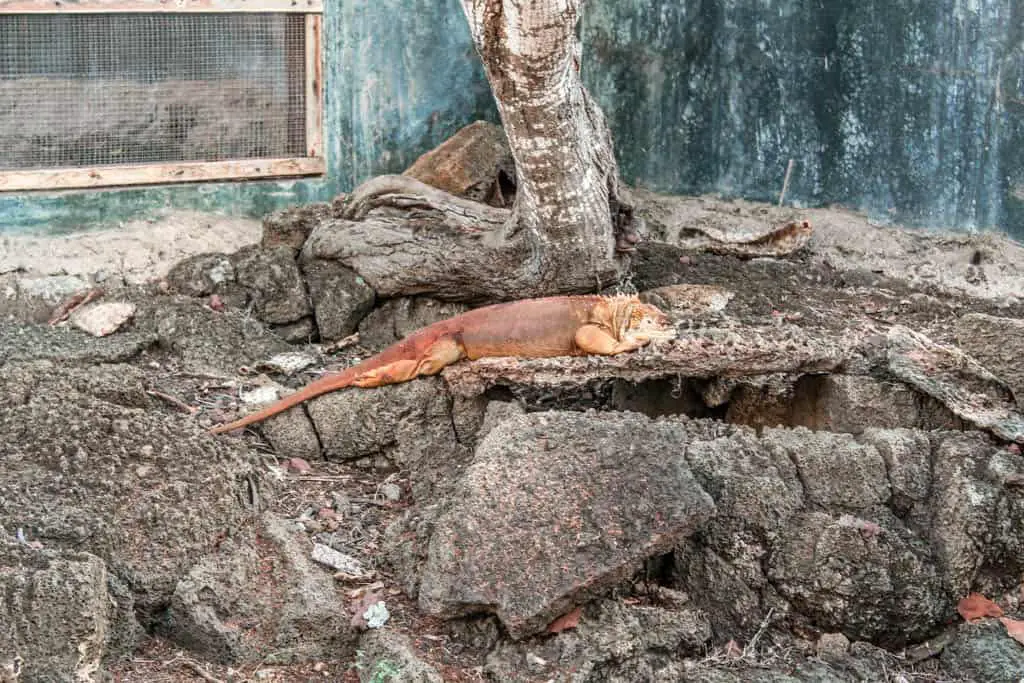
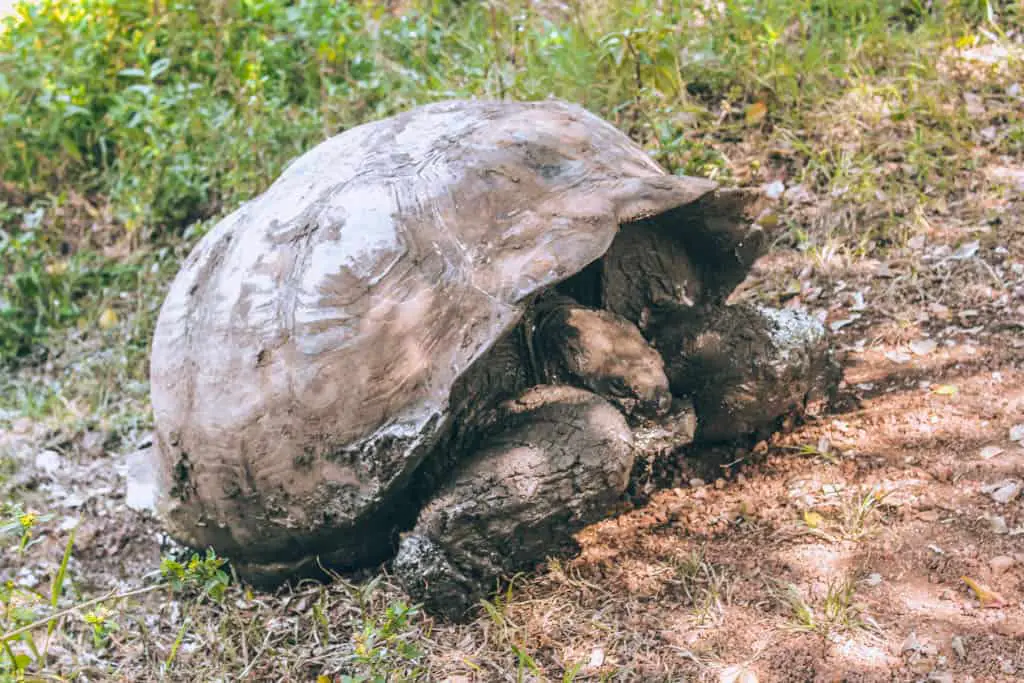
The Charles Darwin Research Station is a non-profit organization dedicated to the conservation of the Galapagos Islands. Established in 1959, the station plays an important role in the preservation of the Galapagos ecosystem and its endemic species, including the famous giant tortoises.
Here you can see the giant tortoises, land iguanas, native plant species, and learn more about the unique islands you’re visiting.
It is free to visit!
Charles Darwin Research Center: Free
Los Kioskos
At night, one block of Charles Binford, from Avenida Baltra to Islas Plaza, becomes an open eatery. All of the restaurants along this block put tables in the street and serve inexpensive ($8-$20), yet delicious seafood. You can walk up and down this block, checking out menus that are written on whiteboards or handed to you by restaurant owners eager for your business. Pick one that looks good to you, relax, and enjoy the lively atmosphere of Los Kioskos.
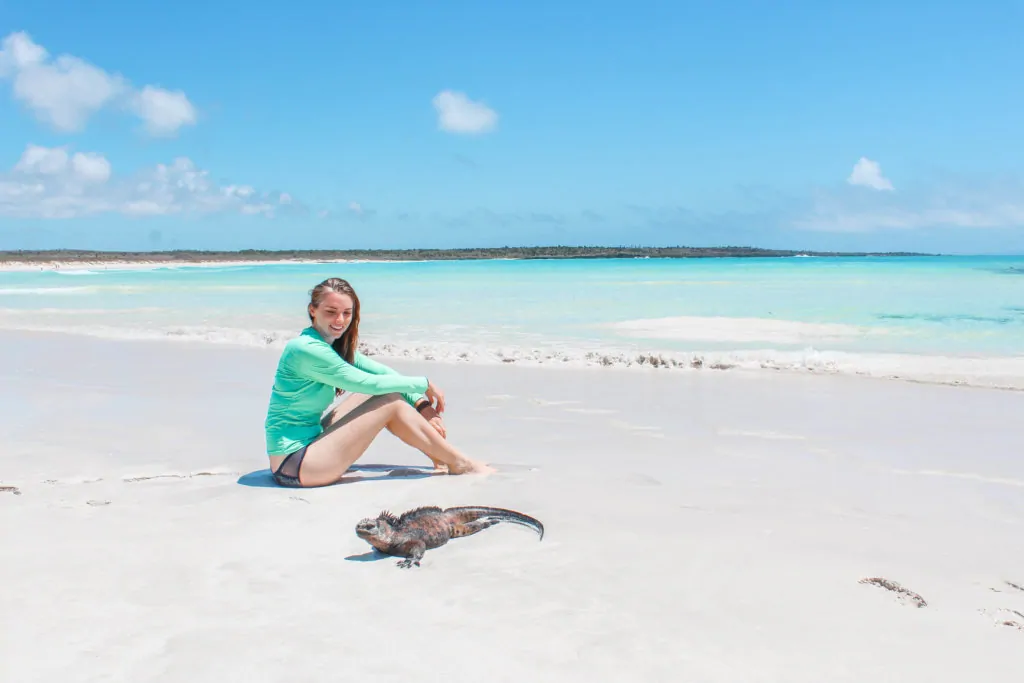
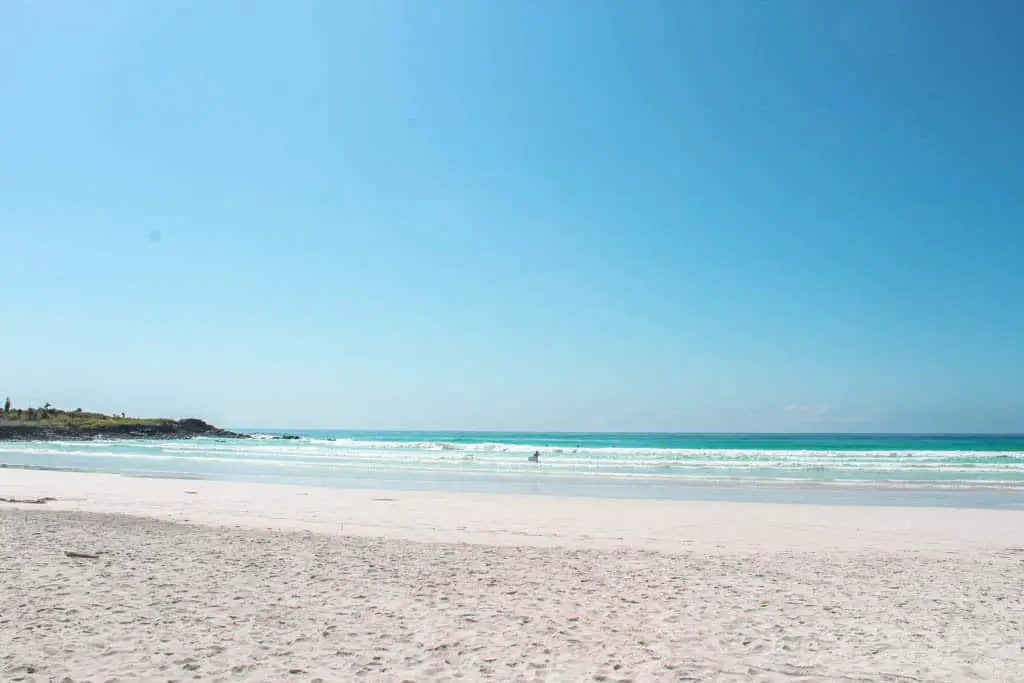
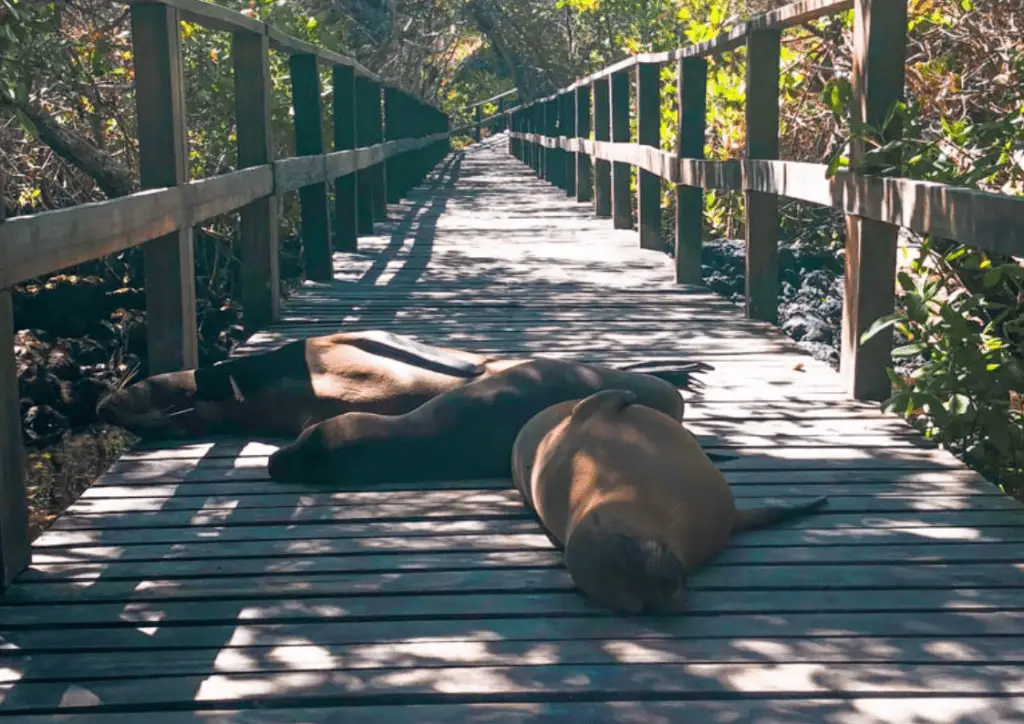
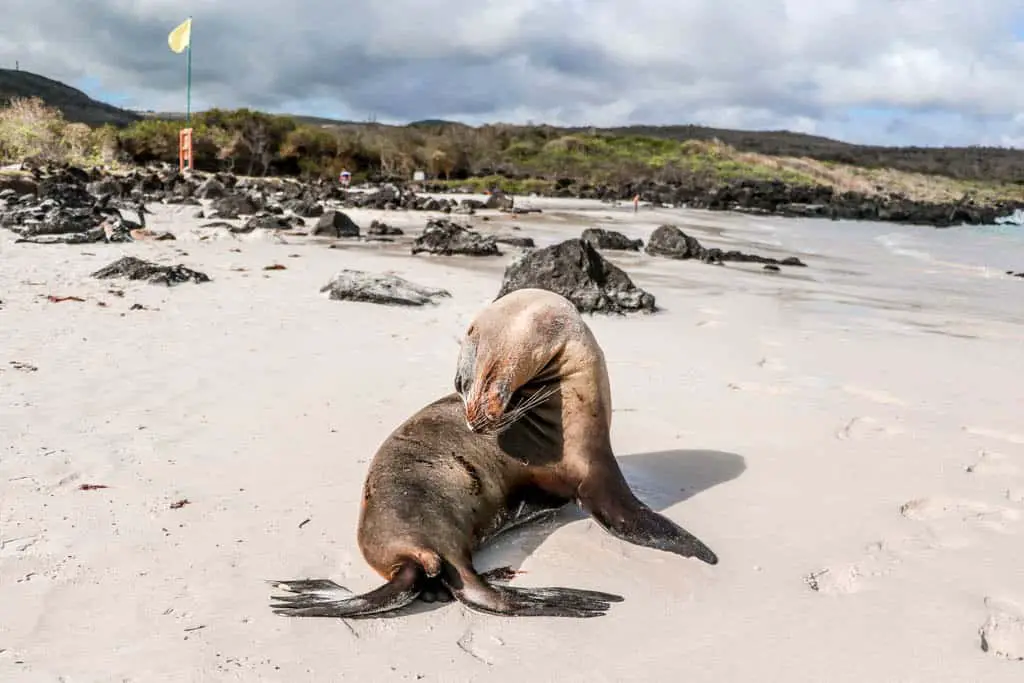
Tortuga Bay
Tortuga Bay is an expansive white sand beach home to numerous marine iguanas, fur seals playing in the waves, and even a shark that spends time in a cove. It is accessible by walking from town or by a combination of a $1.50 taxi ride to the entrance followed by a walk down a boardwalk to the beach.
How to Get to Tortuga Bay
Start the walk on Charles Binford – the same street as Los Kioskos. Follow this street for about 30 minutes(in the opposite direction of Los Kioskos) until you see a staircase and a sign for Tortuga Bay. There is minimal shade along the road, but you’ll pass charming homes!
This is the only portion of the journey that a taxi can take you if you decide to use one.
At the top of the stairs there’s a guard stand where you can purchase water, if needed, and register your visit. Registering means you put your passport number, time of visit, and number of visitors in a ledger.
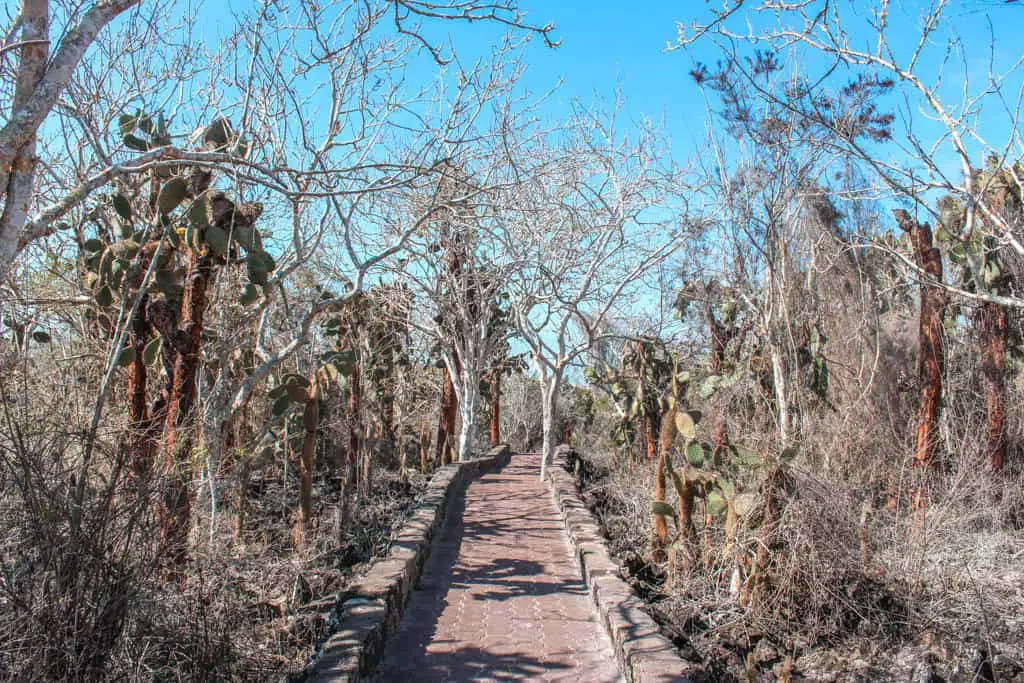
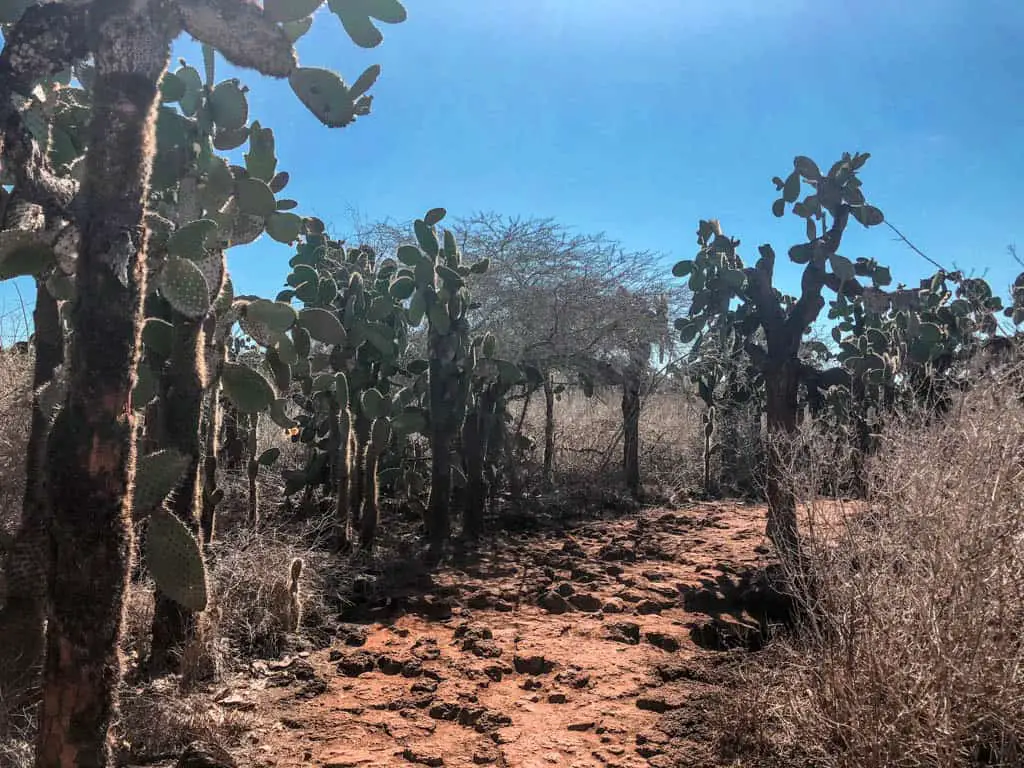
This is when the walk really begins. There is a cobblestone path lined with cactus looking plants and lava lizards scattering about, so watch your step! After about an hour you’ll start feeing the sea breeze and smelling the salty air. You may want to jump right into the chilly waters to refresh after the long walk!
You can continue to walk the length of the beach, watching the marine iguanas sunbathing, swimming, or taking shade in the mangroves.
Be warned – to clear the salt water from their sinuses, iguanas “spit” – just another reason to maintain the 3-meter distance.
Eventually you’ll come to mangrove trees, beyond which is a great cove for snorkeling and a bit of shade.
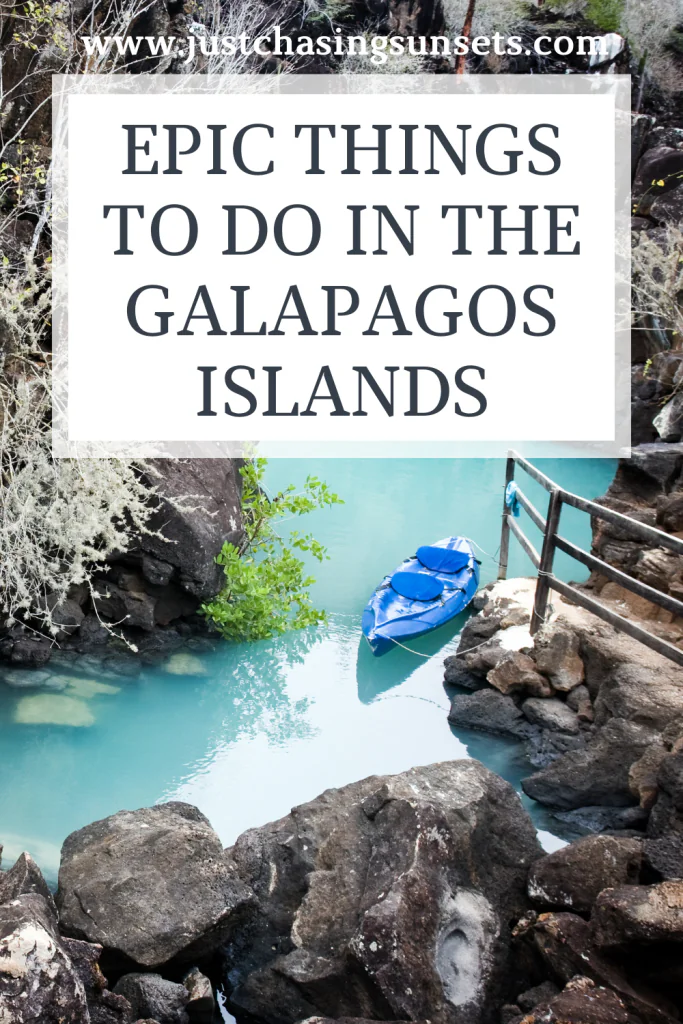
You can rent kayaks here to explore a bit further afield from the beach. Supposedly, there is a shark that hangs out in this cove that you can see from your kayak! I did not rent one as I didn’t have any cash on me, but they cost $20 for a few hours.
For your adventure to Tortuga Bay, make sure to bring along plenty of water, snacks, and sunscreen. The sun here is very strong, my Irish skin handled it well because I made sure to wear a rash guard and used my towel to cover up as needed.
You will easily spend an entire day here, but Tortuga Bay employees begin asking people to leave at 5:00 pm.
Cost for Tortuga Bay: Free – $25
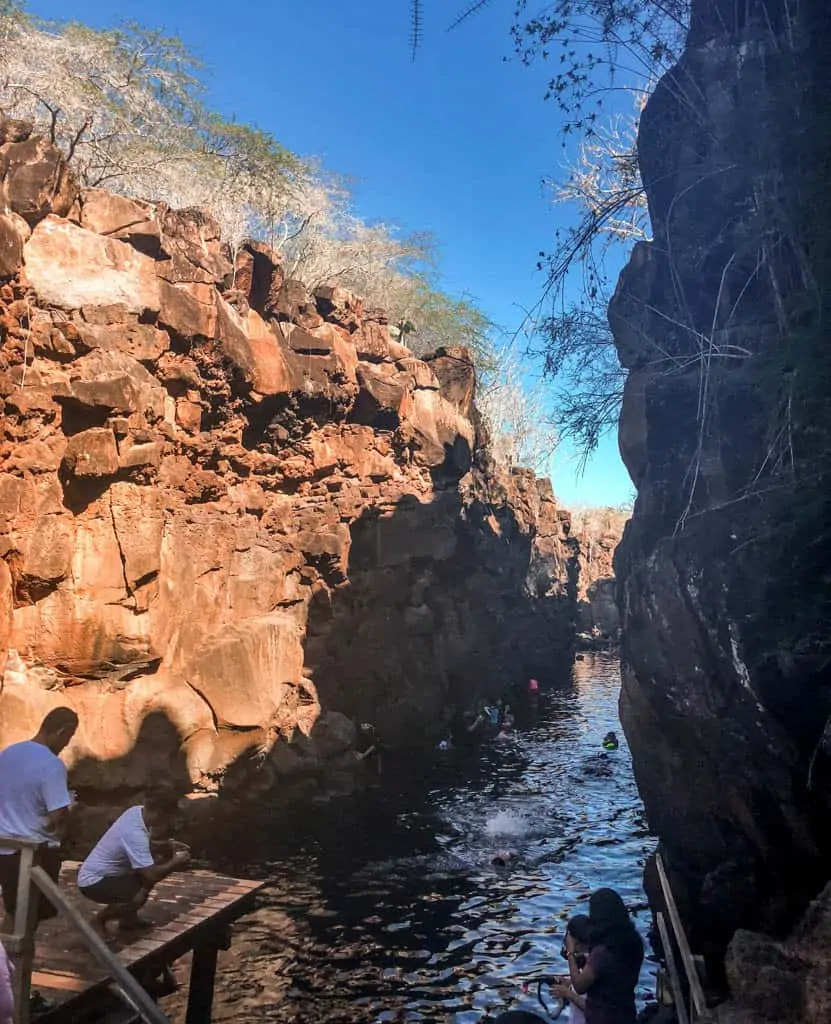
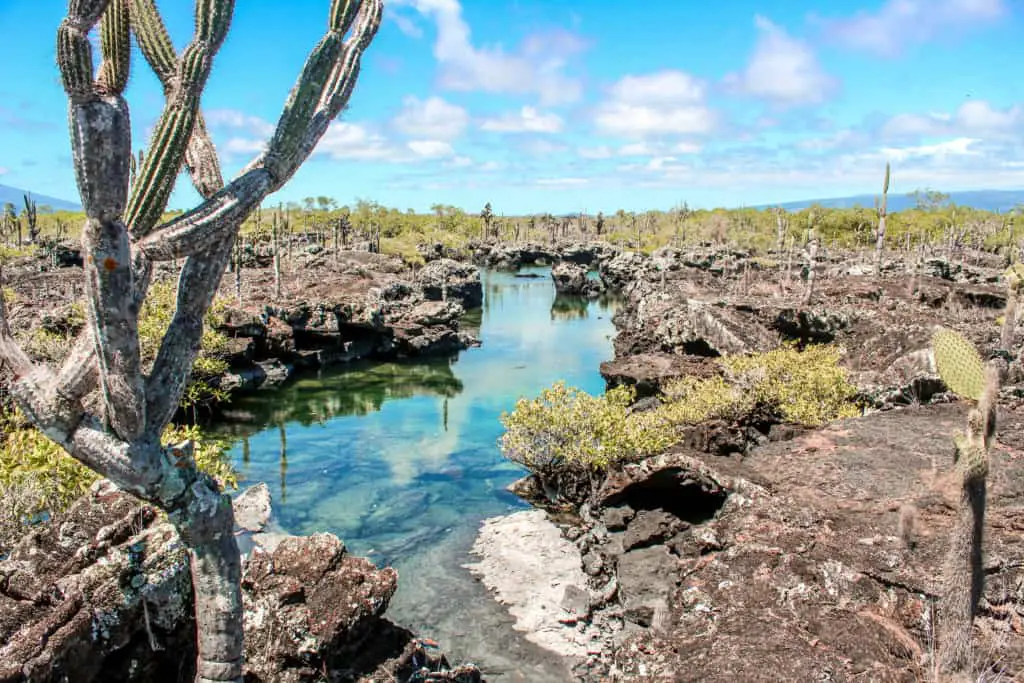
Las Grietas
Las Grietas is a swimming hole in between high volcanic rocks. It’s honestly the best place to go swimming on Santa Cruz island and it’s a fun adventure to get there!
Take a water taxi from the Puerto Ayora pier to Finch Bay Hotel. Follow the clearly marked path past some beautiful hotels, a few restaurants, and a tiny beach called Playa Los Alemanas.
Eventually, you’ll arrive at salt flats where there is a little stand that sells snacks, beverages, and rents snorkels for $4. This is the last place to rent a snorkel before continuing along the dramatic landscape to Las Grietas.
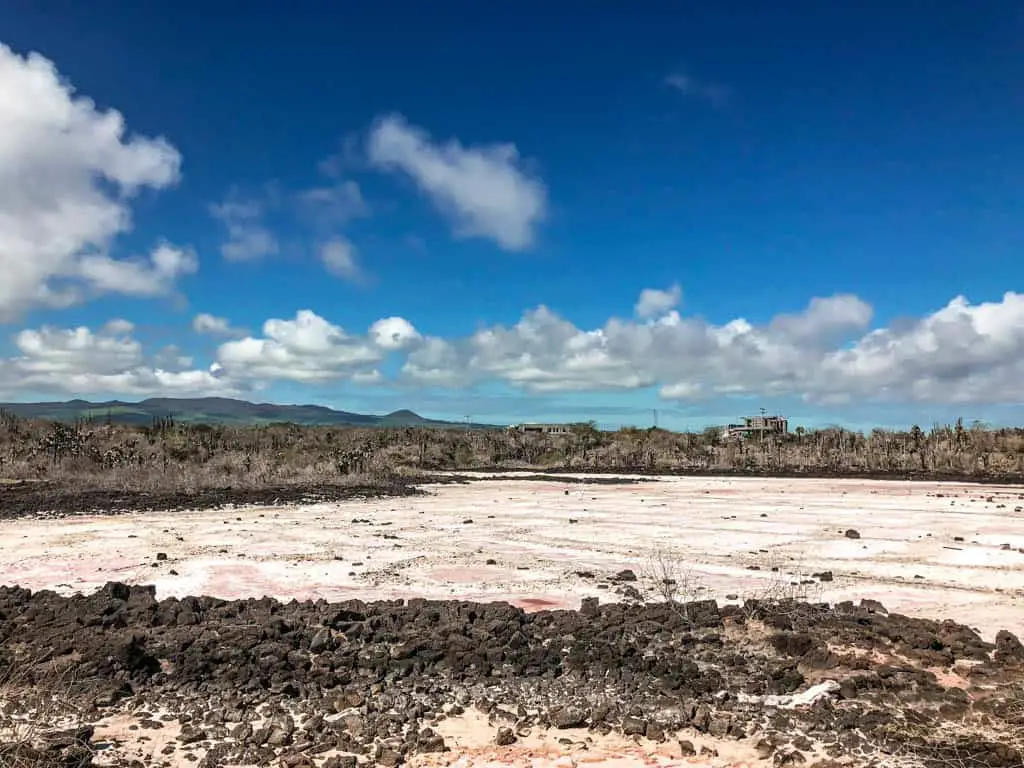
The path became red dirt, a bit rocky, and was lined with vegetation I’ve never seen before. I felt like I was walking on Mars.
Las Grietas is a very popular spot for snorkeling and swimming. If it’s crowded, look just behind the popular area for another snorkeling spot that might have fewer people! The rocks are pretty slippery, so bring sturdy sandals or shoes.
Cost for Las Grietas: $4 snorkel + $1.60 (round trip water taxi) = $5.60
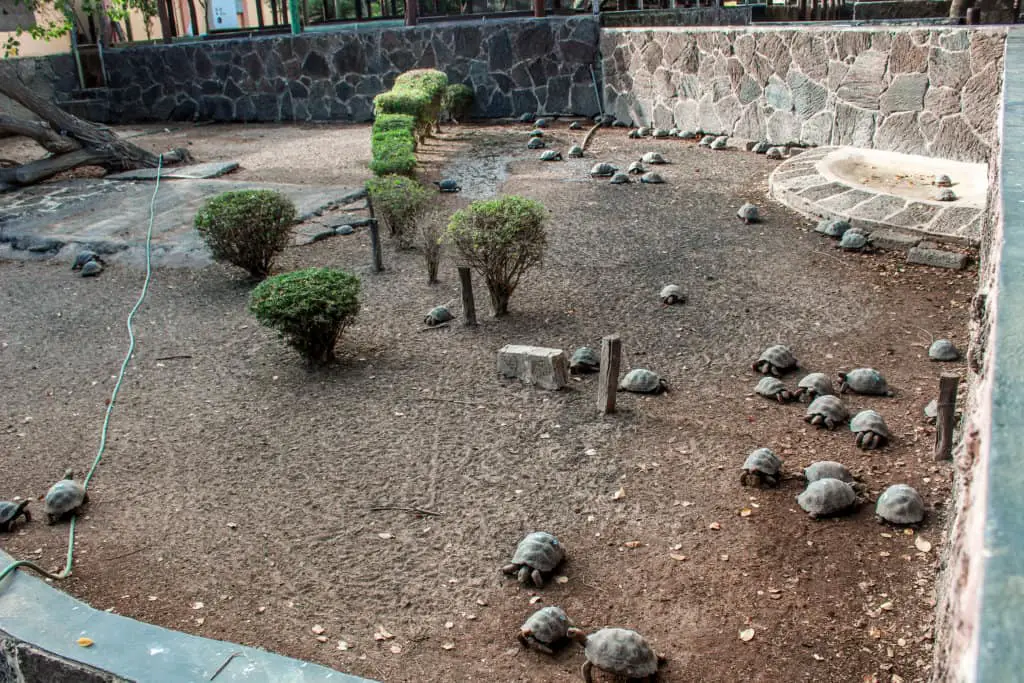
El Chato Tortoise Reserve
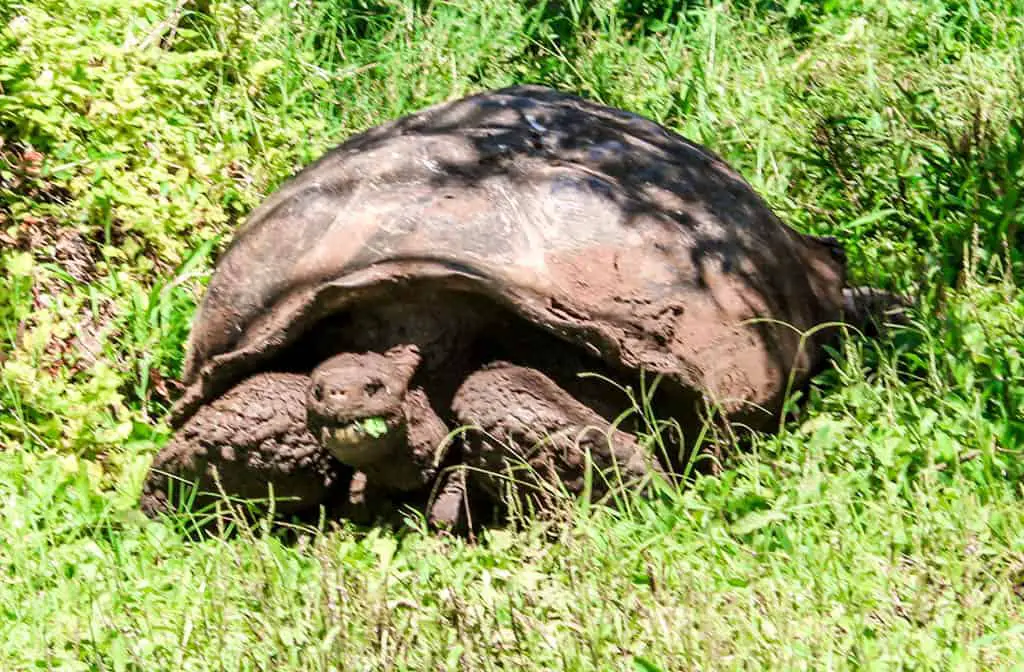
El Chato Tortoise Reserve is an excellent place to get acquainted with the beautiful (and smelly) giant tortoises in their natural environment. There are also lava tunnels to explore on this property that gives you an appreciation for how these islands came into existence.
El Chato is about a 30-minute drive from the town of Puerto Ayora. I opted to pay for a taxi, which cost $35 round trip. If you make a friend on the island, perhaps you could split the taxi fare.
The other option for getting there is to rent a bike for the day which was $15. So if you’re looking to get a good workout in at the same time, this could be a good option for you! Just be warned that the last mile or more is all gravel and there is very little shade. There is a $5 entrance fee to enter the reserve and they offer complimentary tea and coffee.
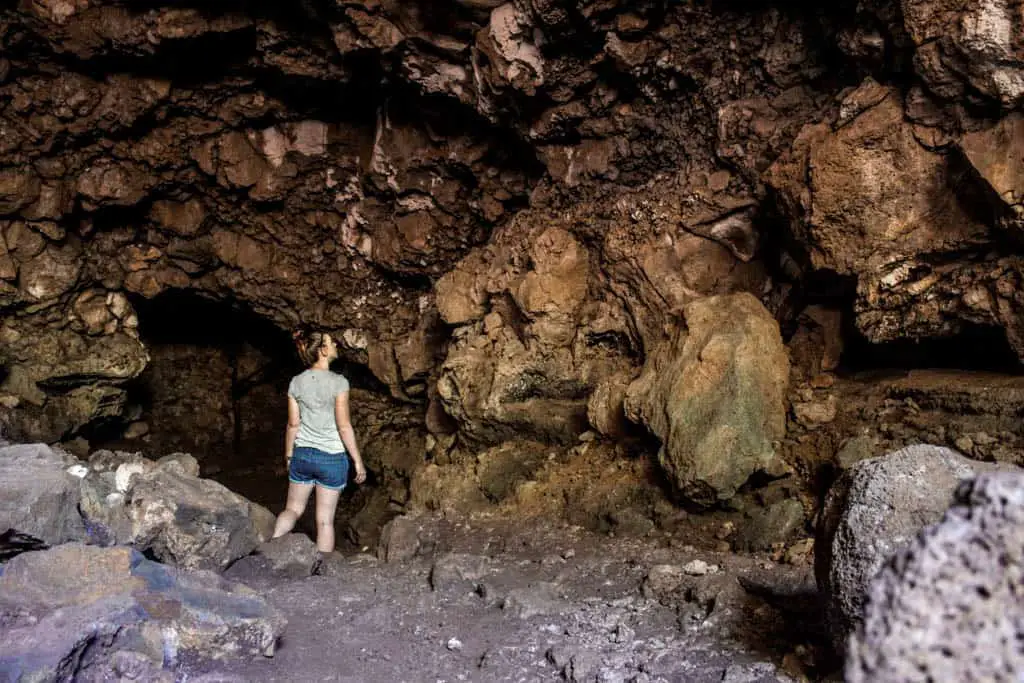
Start exploring El Chato with the lava tunnels. The first tunnel is completely dark and slightly scary to walk through, you can use your phone flashlight to help you get through. The second tunnel has a bit more natural light, and the third tunnel is lit throughout.
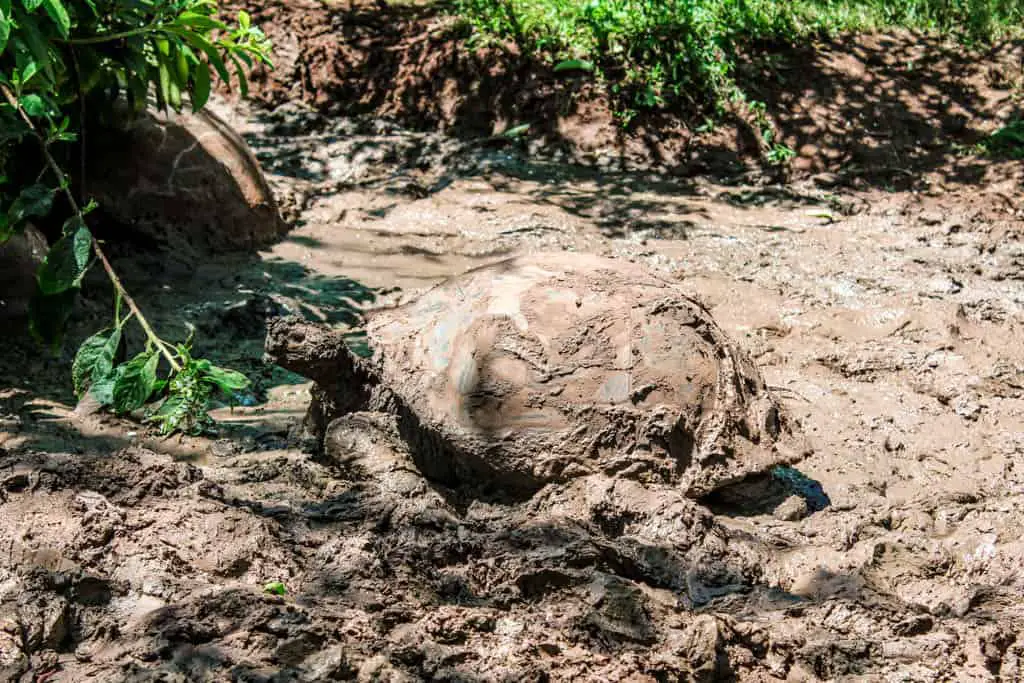
Emerging from the last tunnel, follow the path to a small pond (or mud pit) surrounded by tortoises! You’ll see them everywhere along this path! Watching them stretch their necks out to eat is quite the sight! Surpassed only by watching one press himself up and walk across the path to a shadier spot.
The tortoises let me know with a hissing type noise if I was getting too close for their comfort. They don’t have good vision, but they sense vibrations. One time I approached a bit too quickly causing a tortoise to pull his head in, making another woooshing type noise! I spent about two hours here, finishing my visit with the complimentary tea.
“I was always amused when overtaking one of these great monsters [a tortoise], as it was quietly pacing along, to see how suddenly, the instant I passed, it would draw in its head and legs, and uttering a deep hiss fall to the ground with a heavy sound, as if struck dead…”
Charles Darwin
Cost for El Chato Tortoise Reserve: $35 taxi + $5 entrance fee = $40
Isla Isabela Itinerary
Isla Isabela was my absolute favorite of the three islands on this itinerary. As soon as I stepped foot on the island I loved the vibe. I loved the dirt roads, the easily accessible sandy beaches with restaurants across the “street”, fresh coconuts for sale, and the welcoming attitude of the locals.
I’m glad I took the early morning ferry to the island so I could maximize my time here.
Since I had such a short amount of time, before I even went to my hostel, I booked my Los Tuneles tour. Remember my college friend who inspired me to dig deeper into this trip – she told me Los Tuneles was an amazing day trip from Isla Isabela. I wanted to make sure I had a spot on the boat for the following day!
Where to Stay on Isla Isabela
Hotel Neptuno: I stayed at Hotel Neptuno located on the edge of town. For two nights, a private room with two beds and a private bathroom cost $100. I didn’t quite realize that I’d booked such a large room but decided to not let the cost bother me. There was cheaper accommodation in town, but I felt safe here and it was very clean!
Check rates and availability here.
Cost of accommodation for two nights on Isla Isabela: $100
Concha de Perla
The first place you should go for snorkeling on Isabela Island is Concha De Perla. Rent a mask and snorkel from a shop in town for the day ($4).
Concha de Perla is located right near the pier on the edge of town. It’s clearly marked and there’s a walkway dotted with sea lions that brings you to the snorkeling cove. There weren’t too many people there and those that were said they saw rays, turtles and sea lions.
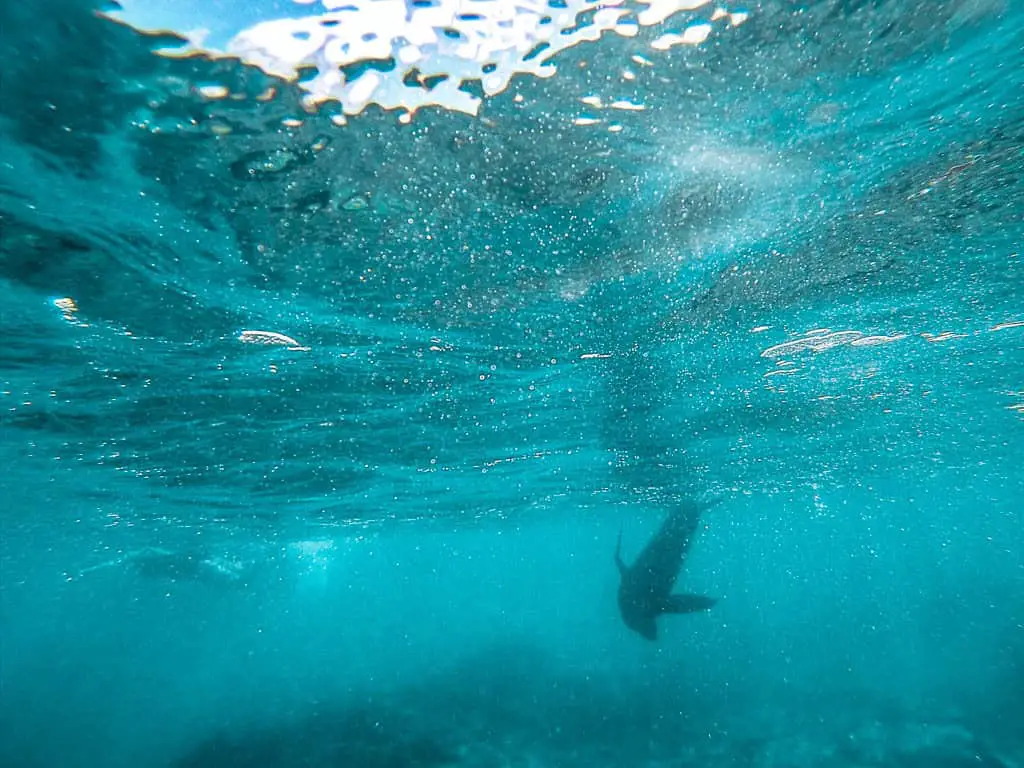
I jumped in to see what I could find. Unfortunately, I didn’t see any rays, but I saw plenty of new fish, chocolate chip starfish, and iguanas swimming underwater. Finally, just as I was about to get out, a sea lion swam underneath me and started playing in the water. For as clumsily as they move on land, they are incredibly graceful underwater.
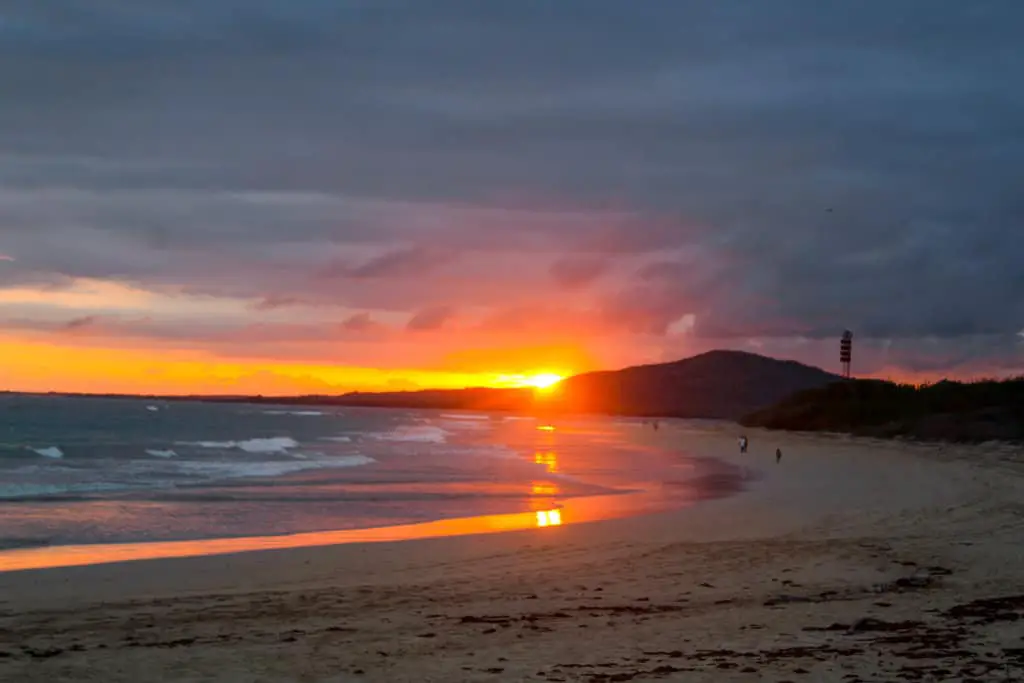
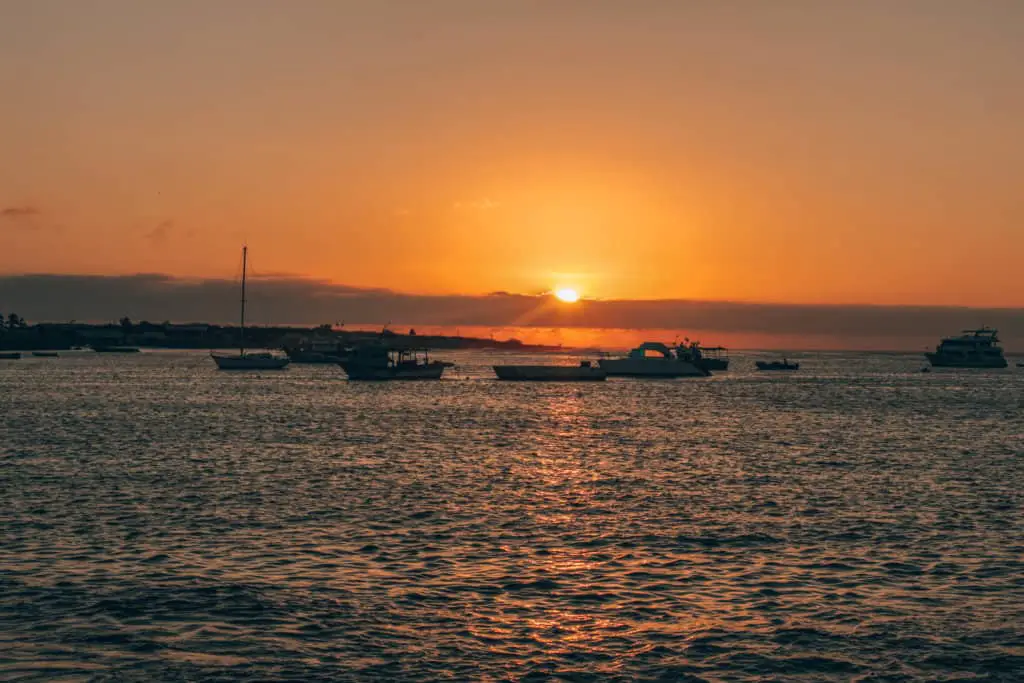
After the snorkeling fun, I headed to the beach where I drank fresh coconut, and caught my first Galapagos sunset! It did not disappoint! I had dinner at one of the many restaurants – taking advantage of the $8 set menu.
Cost of Concha de Perla: $4 snorkel rental
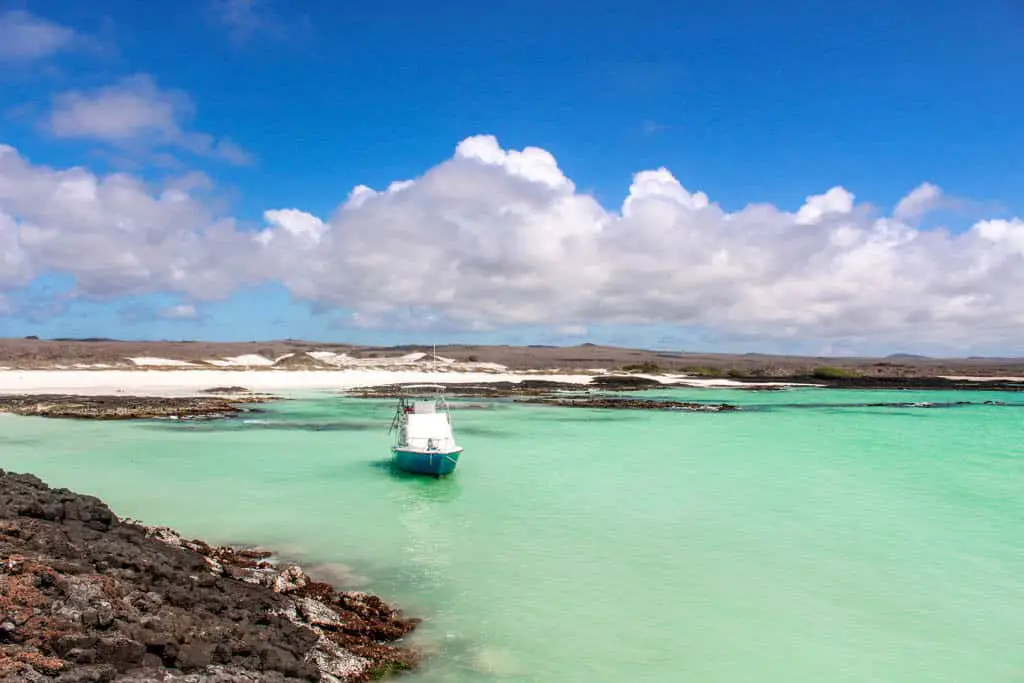
Los Tuneles Snorkeling Tour
Los Tuneles is the best day trip to do on Isla Isabela, and maybe the Galapagos Islands as a whole.This was hands down, the best snorkeling experience I had on the islands. It cost $120; including a wetsuit, snorkel, fins, lunch, towel and hot tea!
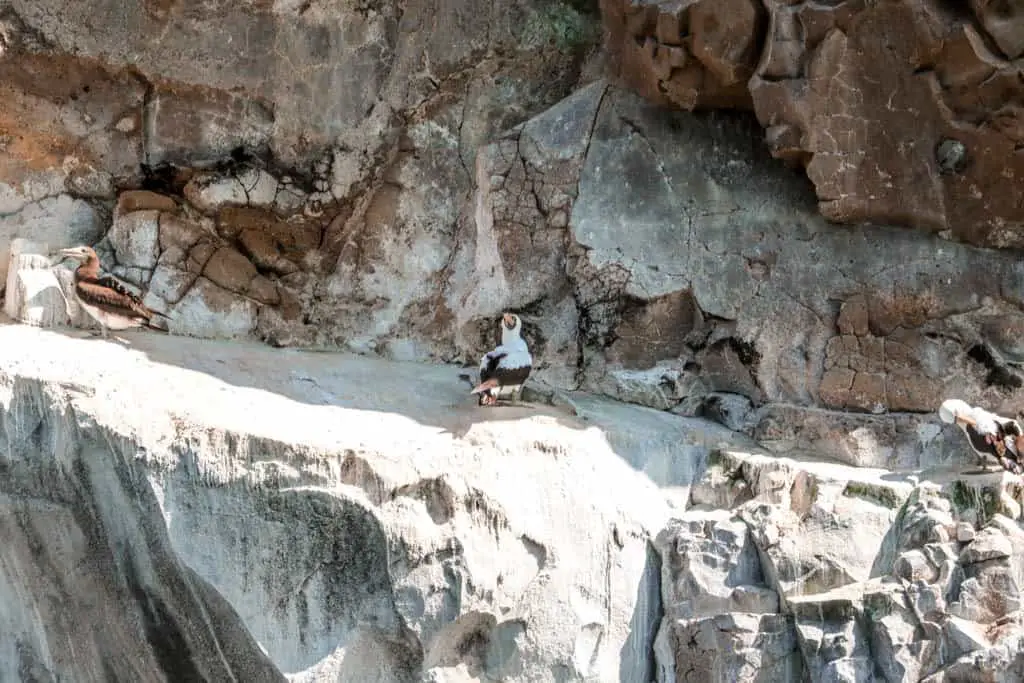
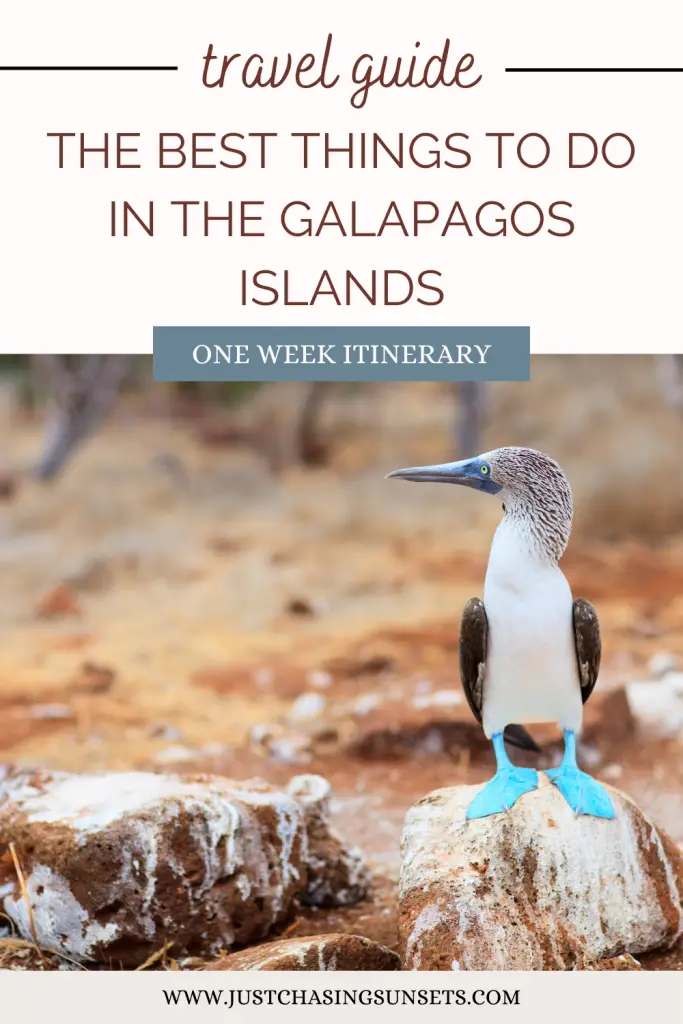
The captain and guide were fantastic, making sure everyone got their photos! There were two locations for snorkeling. At the first, we saw four manta rays, hundreds of white tip sharks (two who were mating!), at least a dozen sea turtles, two seahorses, along with a myriad of other fishes. At the second location, we snorkeled through the lava tunnels before walking on top of them to see the Blue Footed Boobies!
This was my first sighting of the Blue Footed Boobies! The female had just laid two eggs and her mate was keeping close watch. A little further afield we saw a baby Boobie!

Cost for Los Tuneles Tour: $120
Book your Los Tuneles snorkeling tour here.
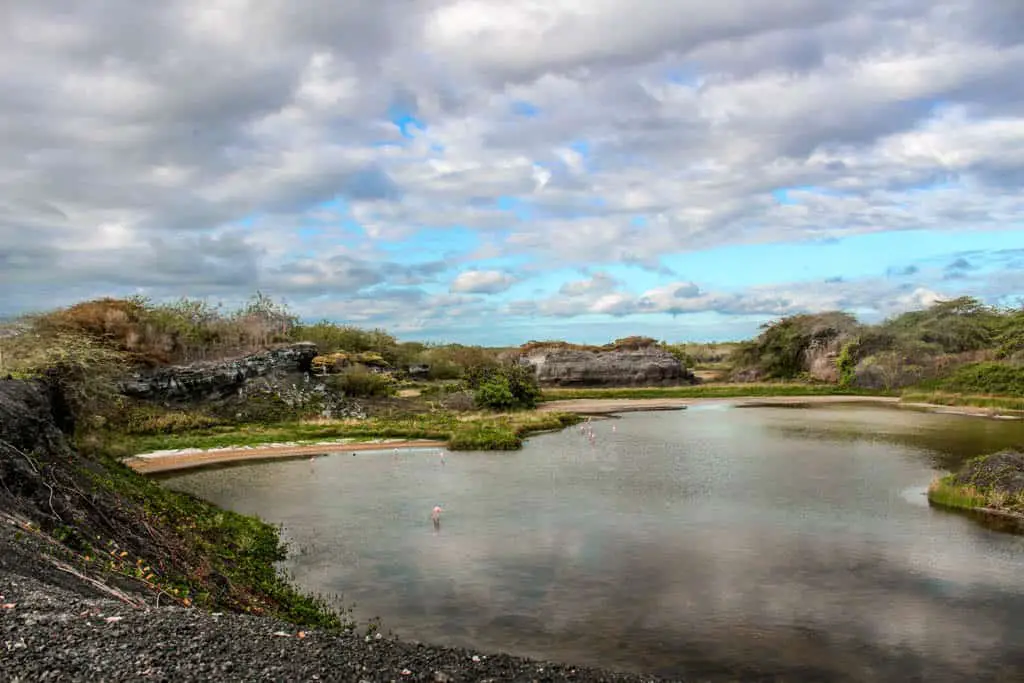
Bike Ride Isabela Island
Returning from Los Tuneles on cloud 9, I quickly changed, paid $2.50 for a fresh coconut and set out for a bike ride. I rented a bike from Galapagos Bike and Surf for $4 per hour. The intention was to make it to the Wall of Tears (Muro de las Lagrimas) by sunset, which unfortunately did not happen as I spent too much time at different points of interest along the way!
On the way out of town, stop at the Tortoise Breeding Center, Centro de Crianza, where you can see baby giant tortoises! Take another detour up a hill to Poza de los Flamingos. The flamingos are actually quite a distance down from the road, but seeing those gorgeous pink colors with the dramatic landscape behind them was stunning.
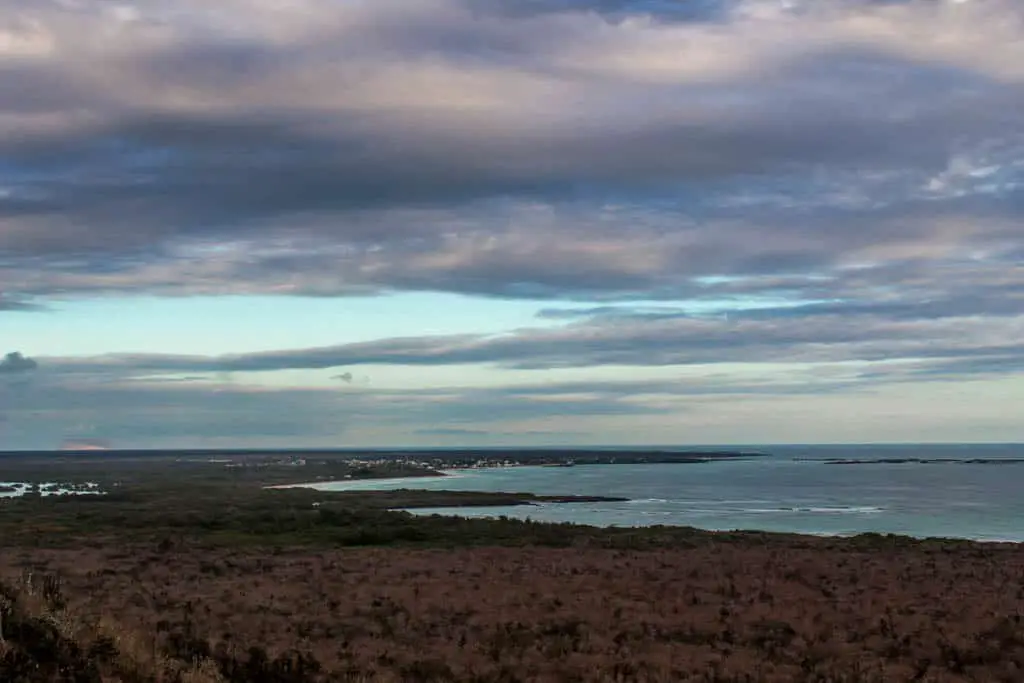
Finally, head to the Wall of Tears, which is about 5km from the edge of town. The first bit of the path is on the beach. I had no idea how hard it was to bike on sand and I had to get off the bike and walk a fair amount of the time, making the bike ride take a bit longer than expected. Once on paved roads, it’s a mostly uphill climb. Be careful of Giant Tortoises along the sides of the road!

There is a viewpoint about 30 mins away from the Wall of Tears where I decided was far enough as I wouldn’t have made it back to the rental shop before closing if I continued further. It was a great spot to relax, hydrate, and prepare for the bike ride back to town. The return trip back was much easier as it’s mostly downhill. As we approached the beach section of the trail, the sun was just beginning to set, stunningly behind the hills. Thankfully, I made it back to the shop just as they were closing up, for a total of $8.00 for the ride.
Cost to attempt the bike ride to the Wall of Tears = $8.00 bike rental
Las Tintoreras
The final tour I did on Isabela was Las Tintoreras. I booked it because a friend I’d met on the island wanted to go and it sounded like a good way to spend the morning, prior to returning to Santa Cruz. It cost $40 from a different tour company than I used for Los Tuneles. In all honesty, I should have saved that $40 and spent the morning relaxing on the beach with a coconut. The tour started with a 45-minute snorkel, where I saw less than at Concha de Perla.
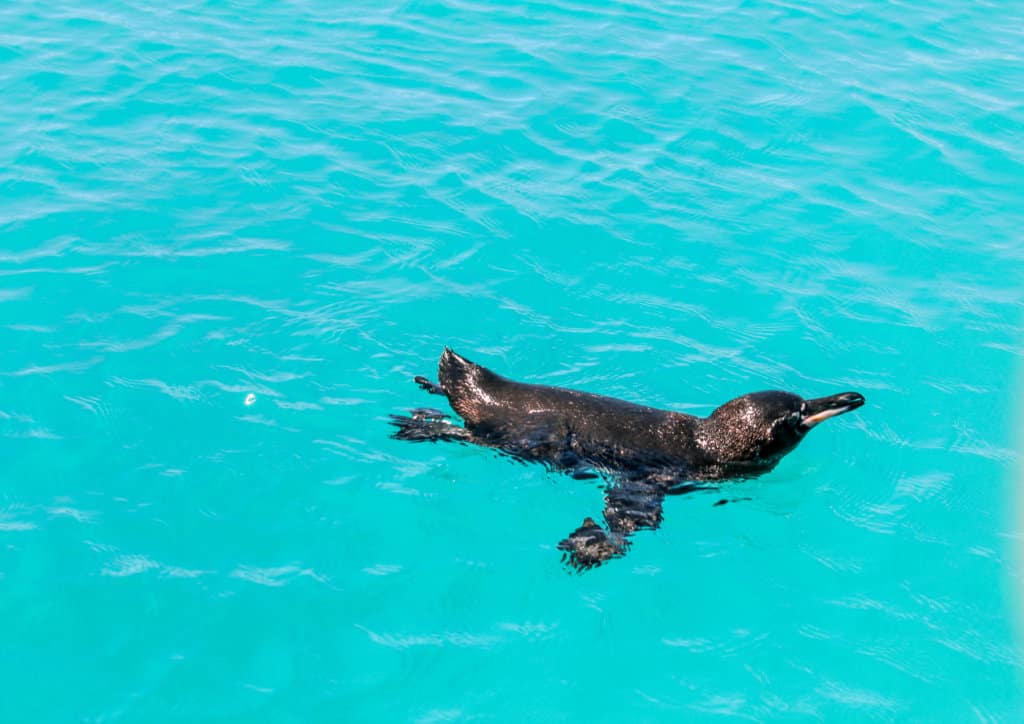
We then took the boat to see penguins, which was the highlight as I hadn’t seen them yet. There were a handful on the rocks, with one fishing in the teal waters. After looking at the penguins from the boat, we disembarked on top of Islote Tintoreras which is home to a plethora of Iguanas.
We walked around this Isla for about 30 minutes, catching a glimpse of white tip sharks and a ray resting in the water below. So, I suppose with the penguins and the ray, it wasn’t a total waste of money and still a fun way to spend the morning!
Cost of Day Tour to Las Tintoreras: $40
Book your Las Tintoreras day tour here.
San Cristóbal Itinerary
After Isla Isabela, I headed back to Santa Cruz Island for the night so I could catch the first ferry over to San Cristóbal!
Where to Stay on San Cristóbal Island
Unfortunately, I don’t have the name of the place I stayed on San Cristóbal. I arrived without any booked accommodations and found a private room, with a private bath for $15/night one block away from the city center. It was just above a restaurant named Lucky’s. You can find Lucky’s recommended in the Lonely Planet Guidebook.
Cost of 3 Nights Accommodation on San Cristóbal Island: $45
San Cristóbal Taxi Tour
I had a mutual friend from California who was disembarking his live-aboard cruise on the same day as my arrival so we decided to split a taxi ($60 for the day) to take us to three different places on the island.
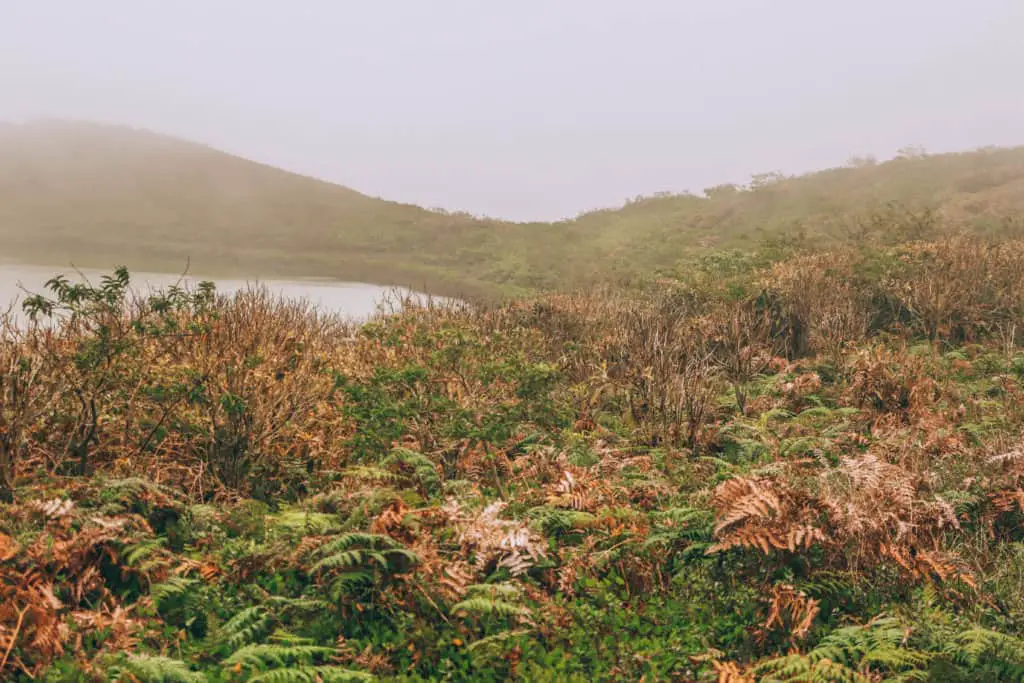
The first stop on the taxi tour was the only freshwater lake on the islands, Laguna El Junco. From the parking lot, it’s a brief 10-minute walk uphill to the crater of a volcano that is filled with fresh water. It was quite cloudy at the top limiting our visibility of the entire lagoon. However, overhead we could see the frigate birds using the freshwater to clean their feathers!
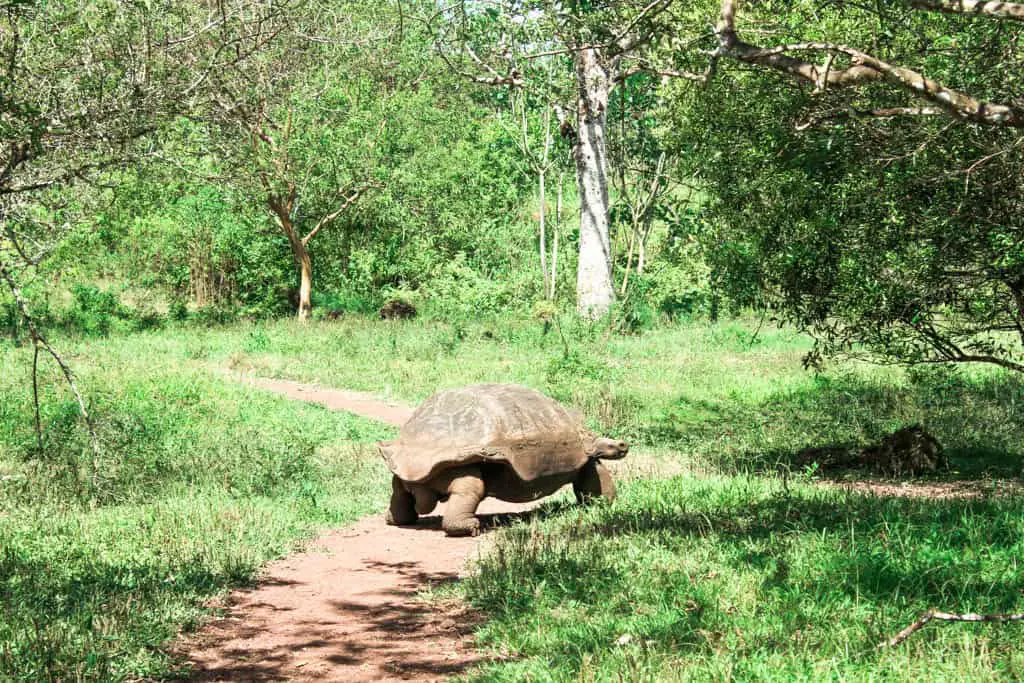
The next stop was the Galapaguera de Cerro Colorado, a tortoise breeding center. Here you’ll follow a clearly marked path through some incredible landscape to see more giant tortoises. It’s amazing how well their shells blend in with the other rocks. At times the tortoises were right next to me, and I didn’t even see them! So keep your eyes open, you’ll find them!
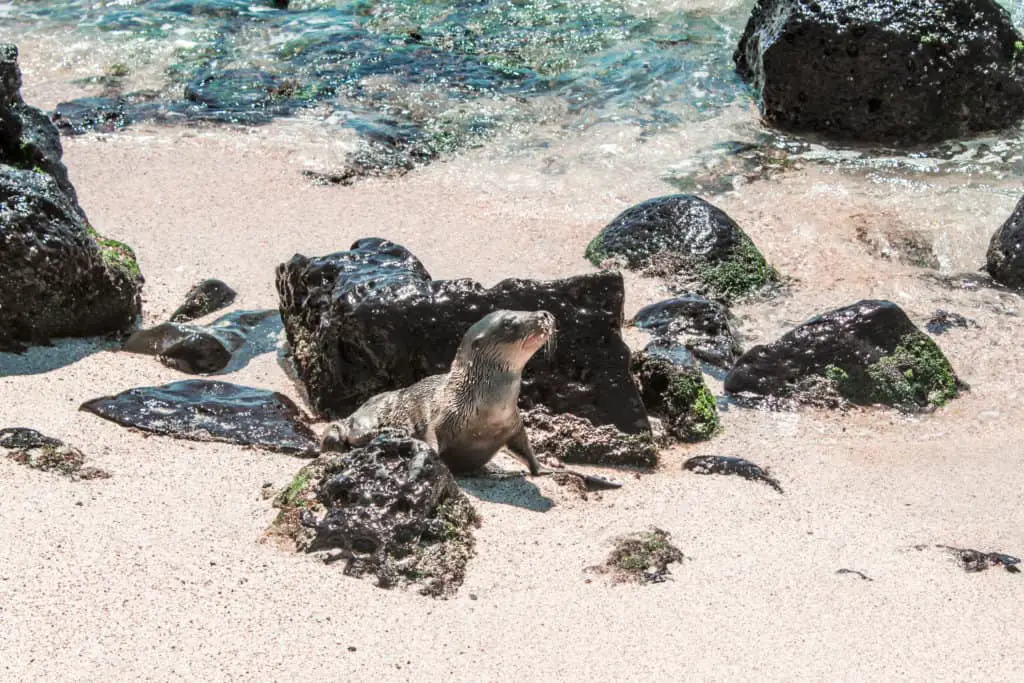
The third and final stop on this tour was a small beach called Puerto Chino that was filled with sea lions, including little pups. Besides a couple with a child, we were the only other humans at this beach. The waves were calm and perfect for snorkeling, had we brought our snorkel gear! This is a great place to cool off, enjoy the quiet, and get a good giggle at the sea lions doing their thing!
The whole tour took about four hours and the taxi should wait for you at each location.
Cost for four-hour taxi tour: $30/person
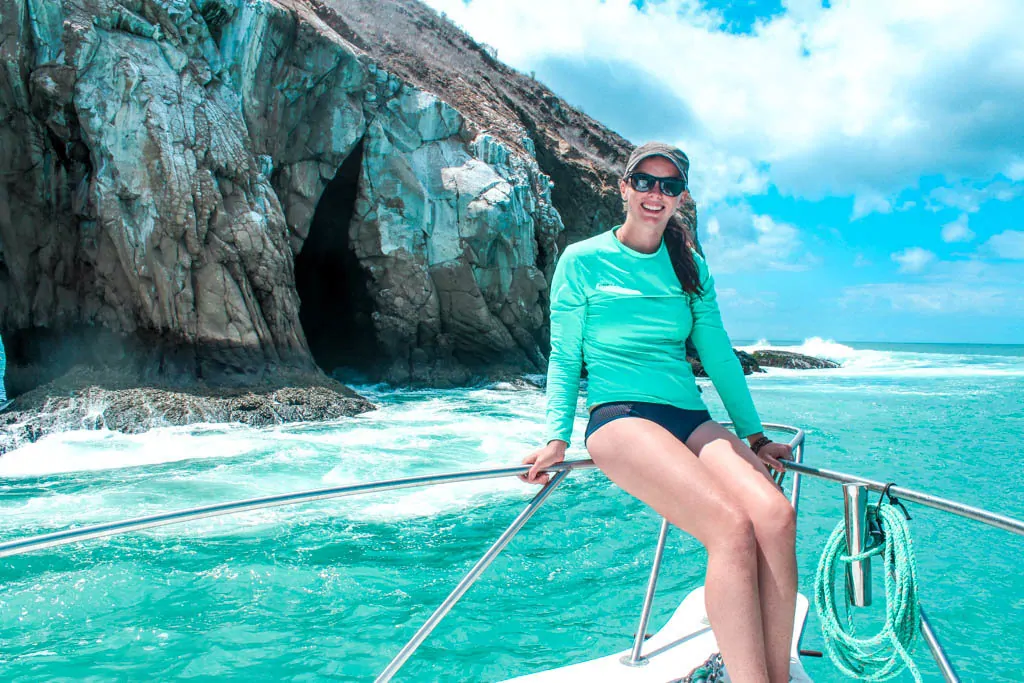
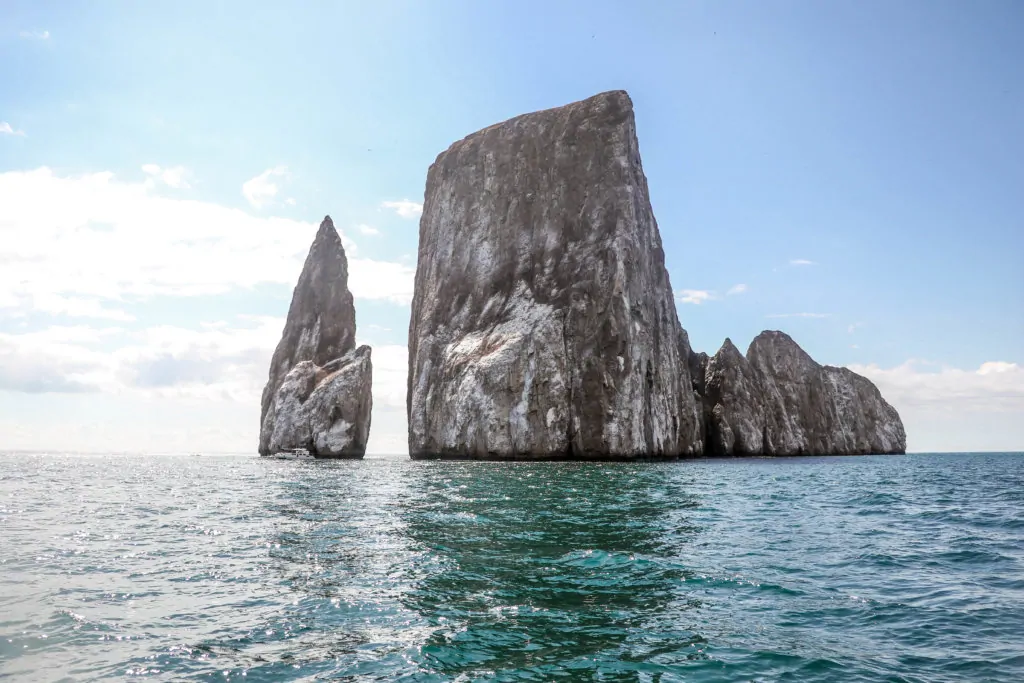
360 Snorkeling Tour to Kicker Rock
The main activity I wanted to do on San Cristóbal was snorkeling at Kicker Rock and the best way to do this was on a 360 tour. So, I signed up with Galapagos Eco Fishing as they included the snorkel, wetsuit, fins, as well as lunch and snacks for a fair price of $130. This was the longest tour I’d done, leaving at 7:30 am and returning around 4:00 pm.
The tour takes you to multiple white sandy beaches where you have the option to snorkel, swim, or simply relax. Additionally, there is open sea fishing at Punta Pitt. Unfortunately, our boat did not catch anything, but it was relaxing being on the water, watching turtles swim by and a variety of birds flying overhead.
The highlight of this tour was snorkeling at kicker rock, known by locals as Leon Dormido. Keep your eyes underwater as you move through the channel for the opportunity to see Galapagos sharks, sea lions, turtles, a myriad of fish, and quite possibly hammerhead sharks!
Cost for 360 Tour: $130
Hike to Cerro Tijeretas
On my final full day on the islands, my friend and I embarked on a hike to Cerro Tijeretas. Follow the main road beyond Playa de Oro and Playa Mann to the Centro de Interpretacion. This center has interesting information about the Galapagos, its development and the impact tourism has had on the islands.
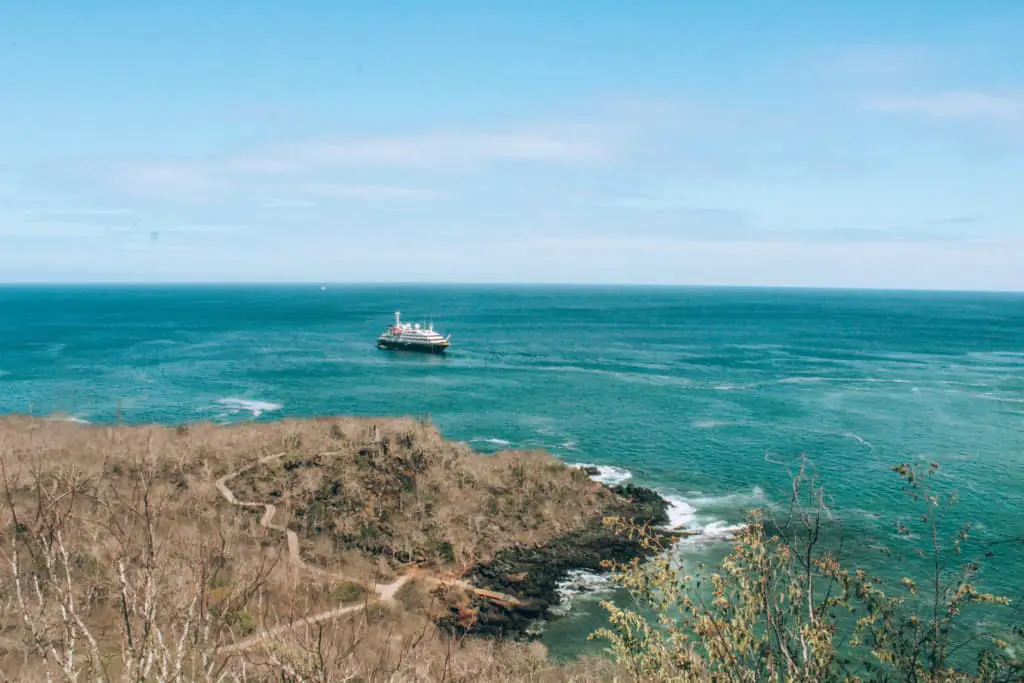
Behind this center follow the signs for Cerro Tijeretas, which provides a great view of the coastline and perhaps a cruise ship out at sea. Below Cerro Tijeretas is Tijeretas Bay, where it is possible to snorkel, depending on the tide. I was quite nervous about getting in the water. It was a very rocky entrance, the waves were strong, and there were crabs everywhere! Crabs are my least favorite, they’re like water spiders! Anyway, after a bit of convincing, I got in the water. I’m so glad I did! It felt great to cool off after the hike.
Beyond Cerro Tijeretas are more beaches along a dirt path, which I’ve heard are beautiful and quiet. We opted not to continue on, as my friend had a ferry to catch. We turned back toward town, passing the Darwin statue along the way and eventually coming to Playa Punta Carola.
There were so many sea lions and their pups on this beach! It was so entertaining watching them swim and play in the water, or lounge in the sand. Playa Punta Carola was the best spot, for me, to snorkel with sea lions. It’s a bit rocky entering the water, so make sure you have your water shoes. I was so focused on the rocks and sea lions, I didn’t even notice my proximity to a sea turtle until he touched my leg with his!
One of the best places to snorkel with sea lions on San Cristóbal is La Loberia, which I didn’t have a chance to visit.
Finally, it was time to bid farewell to my friend. I spent the remainder of my last day on the Galapagos under the shade of a tree on Playa Mann. As the sun began to set, I followed a walkway to the left of the beach. Here, there is a lighthouse, and the perfect spot to catch my final Galapagos sunset.
Cost of Hike and Swimming with Sea Lions: Free
Leaving the Galapagos
Upon leaving, I opted to pay $2.00 for the 5 minute taxi ride from the Malecon to the San Cristóbal airport. Once checked in, you wait outside security. Then they call your flight, allowing you through security. Since only one flight enters at a time, it’s incredibly smooth.
Galapagos Trip Cost
Over the 10 days and 9 nights I spent on the Galapagos Islands, I spent approximately $1650. If you’d like a detailed breakdown of this, I’m more than happy to email you my budget!
What would I have done differently to make this cheaper?
- Only book the arrival night at each accommodation, instead of committing for the entire time. This easily would’ve saved me $80
- Couchsurf – a fellow traveler just told me she couch surfed on the Galapagos!
- Hire a bike instead of a taxi to get to El Chato. Considering I spent another full afternoon at Tortuga Bay I had plenty of time to make the trek!
- Stay at a hostel or hotel with a kitchen so I could cook a meal or two.
When I returned to the Community Hostel, where I was staying in Quito, I was met with many questions about my trip. The most common questions I received were: How did you afford it? I’d love to go, but it’s out of my budget.
The bottom line, with anything we do, it can be as expensive or inexpensive as you’d like. I knew that this would quite possibly be the only opportunity to visit this magical place. I decided to do as much as I could for free and splurge on some particular tours. The time and money would’ve been spent on something, why not a once in a lifetime experience?
Like this post? Pin for later
Pingback: Swimming with Sharks at Los Tuneles - Just Chasing Sunsets
The Galapagos is on my bucket list and I have been overwhelmed with the thought of planning my own trip. This breaks it down really nicely!
So glad it’s helpful! Let me know if you want any more information. Would be happy to help!
This is an amazing post. It’s inspirational. As I was reading, I was hoping you’d include a section on what you spent, and Voilà!! I also appreciated the section on what you’d do differently. You’ve inspired me to take a serious look at this type of trip.
I’m so glad it was helpful!! Expenses are a major reason many people don’t travel to the Galapagos, but it can be done on a budget, and even less than what I spent! If you have any questions as you plan your trip – let me know – I’d be happy to help!
I ended up paying for a Galapagos Trip on a small boat several years ago, it was nice, but I would’ve preferred to do it myself! I didn’t even know you could, until i read your post. I may have to go back again!
Yes! It’s totally possible to do it on your own. It’s nice to have freedom of your schedule! Crossing my fingers you make it back to the islands
Your article is the frst time I really looked at photos of the Galapagos, believe it or not. They really do look like a different world! And of course, they are beautiful. I prticularly liked the wildlife you caught. Very nice. Maybe need to put this in my plans.
I’m so glad you like the photos!!It really was like being on another planet! I hope you can fit the islands into your plans 🙂
I am planning my first solo adventure and I am very nervous! I have spent hours looking at tours and cruises and I really like the idea of diy. And after reading your blog I feel more confident. Was it easy to get around? And to also communicate?
That’s amazing! I’m so excited for you 🙂 The Galapagos Islands are a great place to start solo travel. There are taxis on the three islands I visited (Santa Cruz, San Cristobal, and Isabela). The taxis are white pick up trucks and the prices are generally the same for each destination. Although, you can also rent bikes on each island to explore places further from the main area. Spanish is the main language, and many people speak some English, especially those that work in tourism – so I didn’t have a problem. But I would suggest learning a few key phrases. If you have any other questions as you plan, feel free to reach out! I’d love to go back there 🙂
Hey,
My friend and I are heading over to the Galapagos Islands in January next year and doing a DIY trip. IM LITERALLY SO EXCITED! I was just wondering if you think its a good idea to book the day trips such as the Kicker Rock one and Los Tuneles before heading over or would we be likely to find a tour company with spots pretty easily? Its more the Kicker Rock one im worried about because with the time we have we are planning on arriving the afternoon before we want to do it.
Thanks,
Bryony
Hey Bryony!
I am so excited for you! The Galapagos Islands are amazing, you’ll love it! I booked both Los Tuneles and Kicker Rock the day before. I arrived on each island in the afternoon and went straight to the tour agencies to book it for the next morning. I was there in January as well and didn’t have any problems getting on a tour. I really hope you love your time there! How long will you go for?
Katie
These islands look incredible, so much wildlife is available, it’s nice to see a place where they are so well cared for. I definitely have to go visit!
The wildlife was everywhere! And all of the tour operators are very conscious of making sure we respect their territory which was so refreshing!
This is a great post! I don’t know why it never crossed my mind to look at planning a trip here on my own rather than with a tour company. The views are incredible and i think the Galapagos moved up a spot on my bucket list!
That’s awesome! I’m glad this post inspired you to dig a bit deeper into how to make this trip your own.
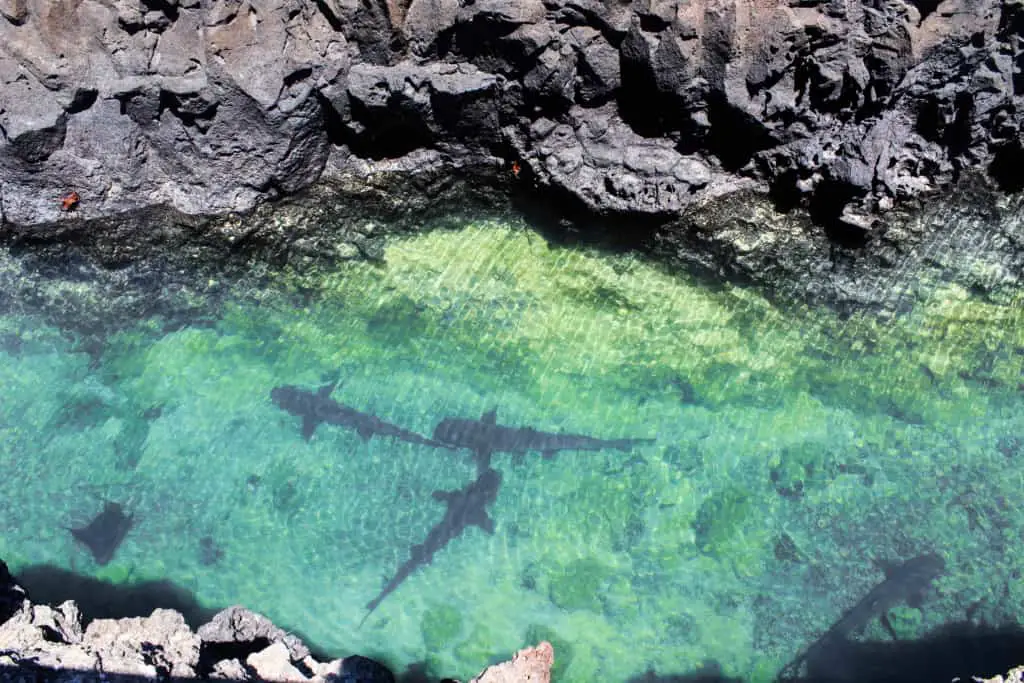
Wow! I can’t believe the amount of wildlife that you were able to see just from walking and snorkeling! Sharks from above is CRAZY! As a scuba diver, I definitely need to add the Galapagos Islands to my bucket list immediately!
I know! I was with a diving friend for a few days and he definitely saw way more diving. But I was so happy I was able to see some amazing wildlife with just a snorkel! I hope you get there!
This is so helpful! I’m also travelling on a budget and try to not limit myself and always finding a solution – but it’s not easy. But to see that you made it work is really inspiring and I love your beautiful pictures from your journey! It surely looks amazing!
I think traveling on a budget means just being aware of activities or experiences we value enough to spend money on them and then not spending money on things that we won’t find joy in. Once we know that we can budget to make our experience what we want!
It looks beautiful. I didn’t realize there was so much wildlife there. That would have been amazing to see.
Yea – it’s crazy! The animals are everywhere!
Ooooh the Galapagos Islands look amazing. Think they are on everyone’s bucket-list don’t you think?! Thank you for this blog. Would love to go there and go on my own.
I definitely think they’re on everyone’s bucket list but I also find that people put it off because of budget restrictions! I hope this helps you plan your trip!
I’m surprised at how affordable you were able to make this trip! I love that you included a list of ways you could have made your trip even cheaper at the end. I think it’s so important to acknowledge lessons learned in these posts! Thanks for sharing.
This was very early in my travels so I was still excited about eating out all of the time and didn’t quite know how to look for the best deals. Sitting down and crunching the numbers was eye-opening afterward. Glad you enjoyed the post!
First off, I also didn’t know you could go there without a cruise! Something to keep in mind! Second, wow!!!! This place looks like a dream, with all the wildlife and pristine waters. I’ve always wanted to go!
I definitely thought the same thing! But it’s super easy to do on your own! I hope you get the opportunity to go!
I always wanted to go Galapagos and thanks for sharing your DIY trip to this beautiful place. Walk to Tortuguay Bay looks worth and I admire your guts to just enjoy wildlife from 3 meters away.
The wildlife (at least the ones on land) don’t seem bothered by humans being there. There was a natural rhythm to it that I appreciated. The walk was awesome – but so hot!
I still think Galapagos is out of my reach so thanks for a candid post. I am not into cruises as well and this detailed diy itinerary is very helpful. Saving it for later when I can go.
I hope you get to the Galapagos one day!
Thank you so much for all this great info. I’m trying to plan a trip to the Galapagos without a cruise and found your info super helpful. I can’t wait to see the Galapagos in person!
It’s totally do-able without a cruise and just as fun! I hope you have a great time!
Where do you leave your passport and all that cash you’re supposed to be carrying around while you swim/snorkel?
I kept it on me some of the time. The other times I left it locked in my room 🙂