Blog
How To Start a Travel Blog
Jun
How to Start a Travel Blog
When I started this blog, I didn’t want to write this post. I figured there are plenty of “How To” guides out there, what more could I add. But that’s like saying, I’m not going to start a travel blog, I’ve got nothing more to add. Except – I do. And so do you. We each have our own unique experiences in this world and it’s a privilege to be able to share them! This blog has been life-changing for me, and I hope you find the same!
I never used to believe those people who said: “I jump out of bed in the morning excited to work”. I thought it was bullshit. And while I still don’t jump out of bed in the morning – Travel Blogging has given me a purpose. It has allowed me to share my passions with you and help you see that if I can do it, without any sort of technical background, then so can you. Blogging was an integral part of allowing me to quit my job and start traveling solo.
Here’s how to get started sharing your travel message with the world
1. Come up with a Name
Coming up with a name is a fun part of this process. You want it to be something that is reflective of you and your travel style, while also having the ability to change and adapt to that name. When your reader hears the name, do you want it to invoke a certain feeling? Do you want it to reflect your adventurous travel style? Are you a foodie at heart and plan to explore all of the amazing food in this world? Figure out what you want to write about and start brainstorming some fun words that describe the niche you’ll be talking to with your blog. There are a few important things to consider when deciding on a name for your blog.
Let it Grow with You
Your name should grow with you. Yes, you may start out backpacking through Asia, but in a few months, you may hop over to Europe. A name such as Alice in Asia works great in the beginning, but in Europe. not so much. With my name, Just Chasing Sunsets, I could be anywhere in the world. And if I decide to stop traveling, then I can be “Just Chasing Sunset” in my new city.
Keep it Simple
Avoid anything that requires a hyphen or is more than two or three words. This helps people find you more easily on the web! Also, imagine having a conversation with a brand or company you’d like to work with and telling them the name of your blog. Does it roll off the tongue?
Be Unique
There are already plenty of people out there with blogs using the words Adventurous, Nomadic, Wandering, etc. Have you hear of Nomadic Matt? Why would you want to be Nomadic Kate and have to constantly be trying to separate yourself from him? Step outside of the box, come up with something original and unique to the story you will tell. A thesaurus is an excellent tool.
Google the Name
Once you decide upon a name, Google it. Is the domain already taken? If so, is it currently being used for the same purposes? For instance, my original name was simply Chasing Sunsets. Yet, the domain name was taken, although it only says “site under construction”. Upon further research, I realized there is a book written called Chasing Sunsets. So, I added a slight differentiator with the “Just”. I didn’t like it at first, but when I said it allowed for the first time I fell in love with it. So don’t be 100% tied to your name until you know it’s yours. Also – check social media and make sure to get all the sites with that name.
Have fun with this!
So many people, including myself, get hung up on a name. Write anything that comes to mind down, even if you know you won’t use it. It may lead to another idea. If you’re in a creative rut, get outside and come back to it later. Being outside might spark something in you.
For more tips on this check out this podcast describing 4 considerations for your Domain Name.
2. Decide on Hosting
I had no idea what hosting was when I started my blog. All I knew, is that Amy Lynn Andrews told me I need to set up a hosting service, so I did. I’ve since learned that my blog basically rents space on servers. So all of the blogs, images, etc you see here are housed on a server, so when you type in my name, my blog pops up!
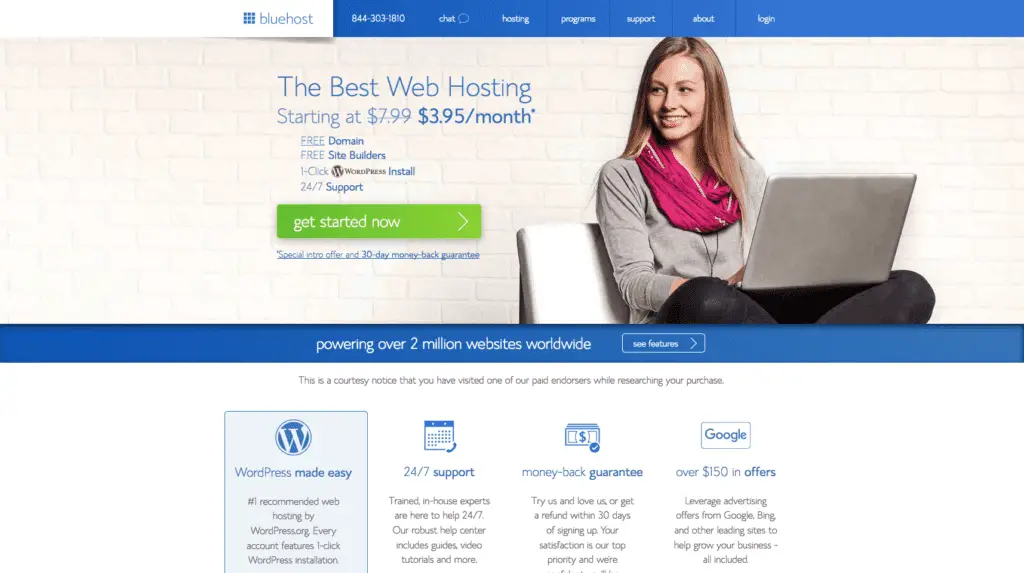
There are lots of hosting services on the web, yet most of my favorite bloggers recommended Bluehost, so that’s what I went with. It was incredibly simple to get started and fairly inexpensive. You can get their basic plan for $3.95 per month, which is what I use, with this link. That’s like, not even one Starbucks! I’ve also had to use their customer service a handful of times and they always respond promptly with the correct solution to my problem.
Step 1: Go to bluehost.com. Click on the green button that says “Get Started Now”
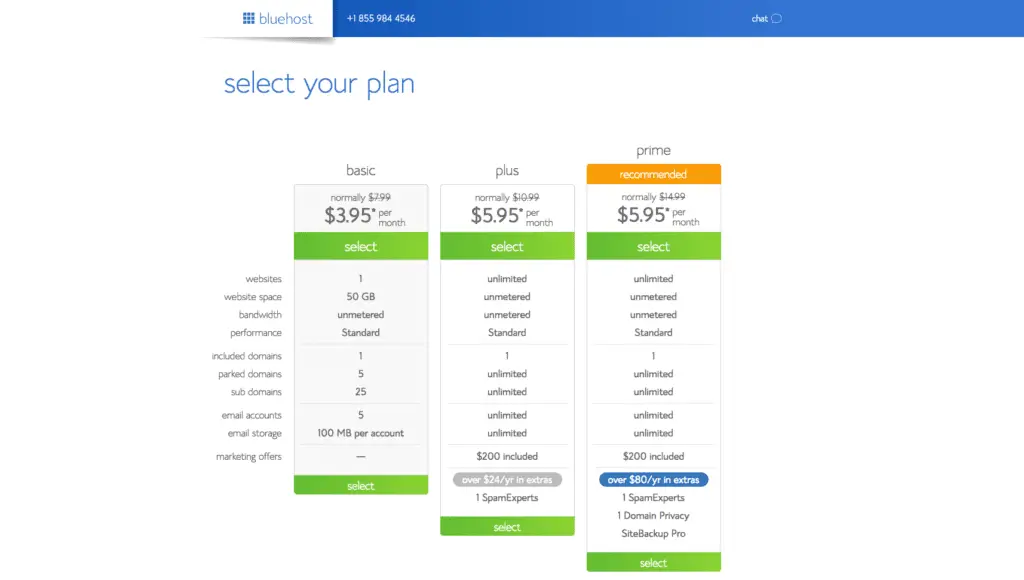
Step 2: Pick a hosting plan. Like I said, I currently use the basic plan as I have a baby blog. Yet, I know I can easily upgrade as my blog continues to grow.
Step 3: Search your domain name: From your Google search, you should know whether or not this is already taken.
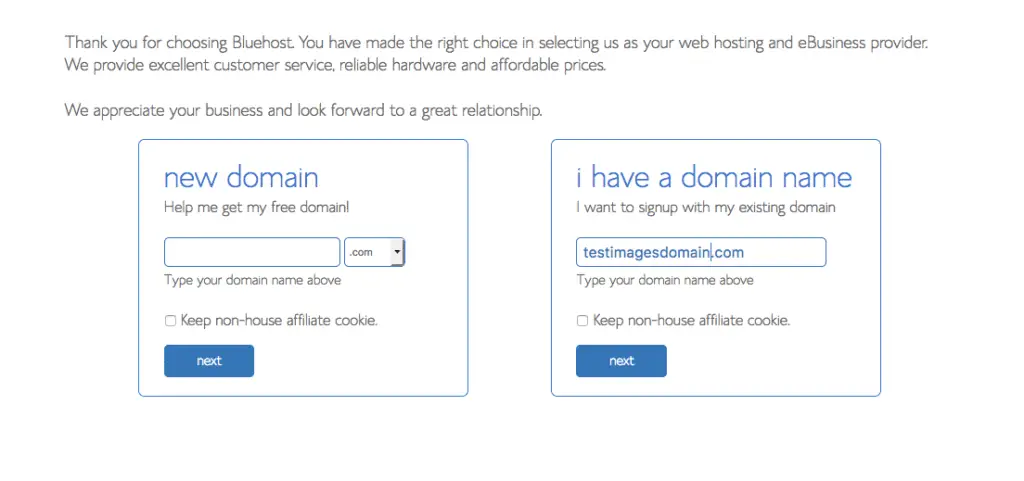
Step 4: Choose your Package: Decide the length of the plan and any other options. The only one I suggest is the Domain Privacy Protection. Your SSL certificate comes free with your WordPress site.
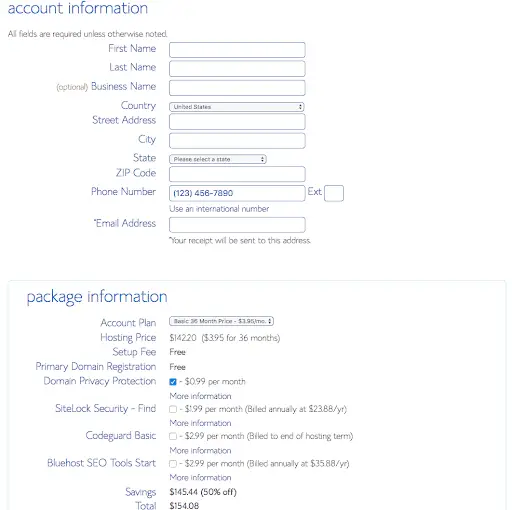
Step 5: Follow the instructions. You will enter billing information and set up a password. If you like any of the themes offered, feel free to choose one, but we will go over themes later. Don’t spend too much time on the theme just yet! Then you’ll be ready to setup WordPress!
Woohoo! You are now the proud owner of your very own slice of the internet!
3. Set up WordPress
Why WordPress
There are a number of blogging platforms in today’s market. I set up my very first website using Squarespace because it seemed more user-friendly. Yet, I shut that down, switched to WordPress, and haven’t looked back. Here’s why I switched –
I had the word Squarespace in my domain name, which is not the branding I wanted.
It’s what all of my favorite bloggers use and I am a big believer in learning from those who are successful where I want to be successful!
Self-hosted vs Hosted
There are two options for WordPress: Self-hosted or hosted. If you’re serious about travel blogging you want the self-hosted option and here’s why:
- Your domain name is the name you choose, without WordPress taking up space. For example, my blog is self-hosted so the domain name is simply “justchasingsunsets.com” instead of justchasingsunsets.wordpress.com. It’s much better for branding!
- While hosted blogs are free, self-hosted gives you more income potential through advertising.
- You can use Google Analytics, which is important!
* I went back and forth with this decision, and I am incredibly happy I went with self-hosted!
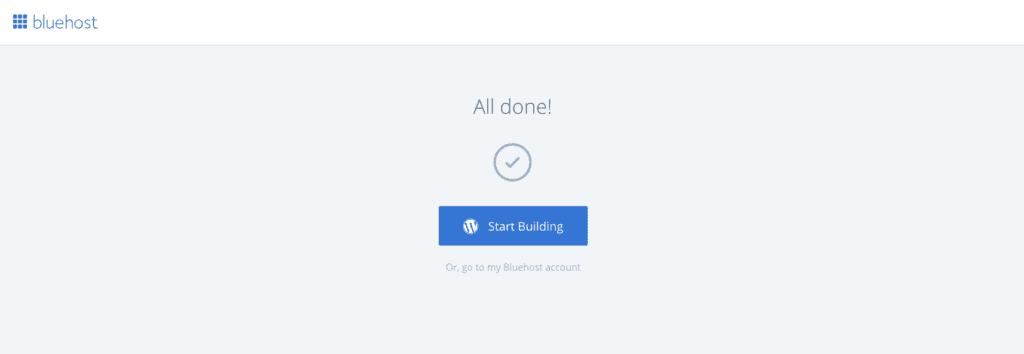
Installing WordPress is super simple with Bluehost – it’s done automatically!
Once it’s installed you can log in to the WordPress.com dashboard using the same credentials as your Bluehost Account. Moving forward, you can log in to WordPress by going to yourdomain.com/wp-admin. Change yourdomain to your actual domain name! Make sure you have an SSL certificate (http to https) on Bluehost – this is free and adds security to your domain.
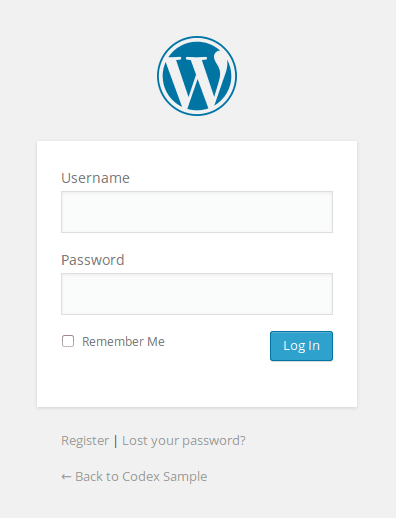
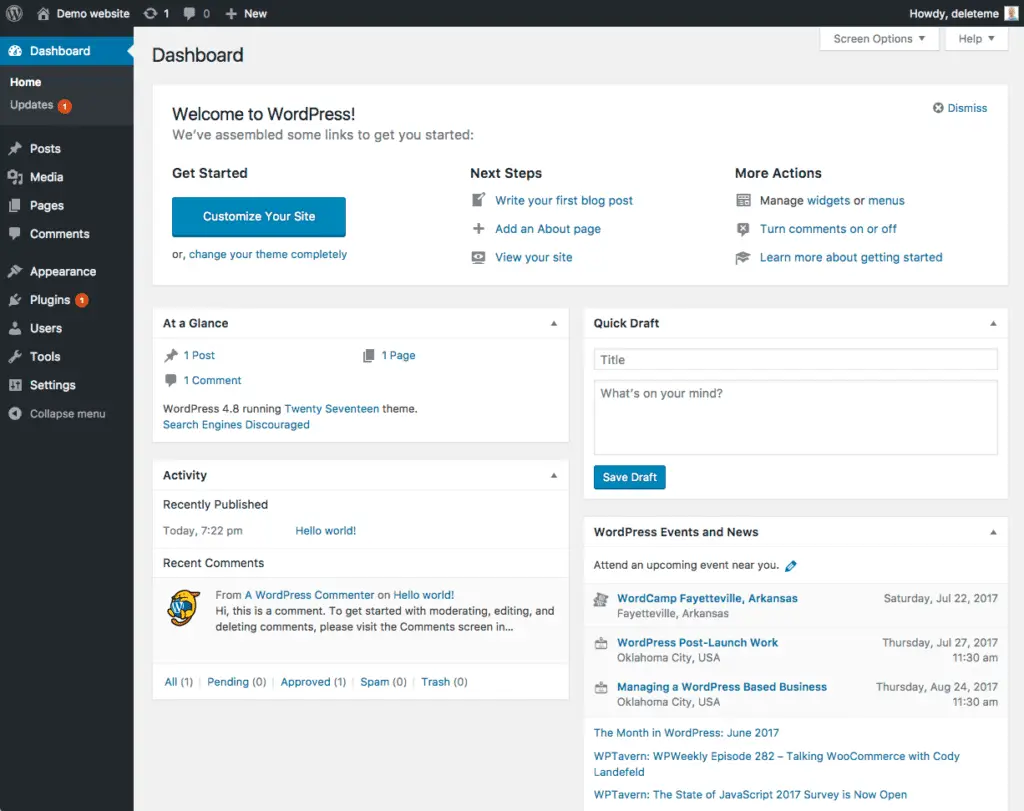
Spend Some Time in Your WordPress Dashboard
Before moving on, get to know the basics of your WordPress dashboard – this is where the magic happens. To the left is where you can add posts, pages, plugins etc. Once you add your theme, more items will populate here, so get used to it in its basic state! On the top there is a menu to view your site
4. Customize your Blog
Choose a Theme
On your WordPress dashboard, you will see some themes available to you. These are great to start out, but I opted to use an outside source for my theme.
I know nothing about code, so choosing a simple to use, clean, aesthetically pleasing, and a professional looking theme was crucial for me. Following the advice of Amy Lynn Andrews, I got a theme that is based on the Genesis framework – which she explains much better than I ever could!
My theme is called Gallery Pro, from Studiopress.com. Another popular one found on Studiopress.com is Foodie Pro. It came with instructions detailing the proper installation steps. The support was incredibly helpful in the beginning as I was getting set up! There are less expensive, and free, options out there – but I didn’t like the layouts as much.
Some considerations
- Woocommerce – I chose a theme with Woocommerce already included. If you plan to sell items on your blog, I suggest a theme that includes some sort of e-commerce from the start
- Before you get lost in the world of themes – take out a blank piece of paper and draw what you want your blog to look like. Brainstorm where you want the main content, the sidebar, the header, the footer, etc. Then focus on these details while theme shopping.
- If none of the themes are in line with the vision for your blog, and you have the budget, hiring a web designer is always an option. I’d start by asking friends if they can connect you with someone, or head over to Upwork as a start!
Create a Logo/Header
There are plenty of options for logo design. You can visit Upwork again, 99 designs, or Fiverr. For my first website, I found someone on Fiverr and never really liked the design for the price. So, I turned to Canva, created my own simple logo, and absolutely love it!

5. Install these Plugins
There are so many plugins out there – these are a great starting point. As you go you will find more that you want to include.
- Akismet – this will filter out spam comments so you don’t have to deal with them!
- Google Analytics – this is necessary to help you see how readers are using your blog. Once again, Amy Lynn Andrews explains it all!
- Yoast SEO – this optimizes your articles for Google – incredibly important!
- Social Warfare – a simple plugin that allows readers to share your content to their favorite social media platforms
- BackWPup – make sure all of your content is backed up, just in case something happens!
6. First Steps
Write Your About Me Page
When a new reader lands on your blog, this is likely where they will head to get an idea of who is writing. Use this page to share who you are, your background, and give people a reason to follow you! Keep this fun, let your personality shine through!
Write and Publish a Handful of Posts
Some well-seasoned bloggers used to recommend not launching your site without 10 blog posts scheduled. If I followed that advice, I never would’ve gotten ONE blog post up. My advice is to start where you are, with what you know and write from that place. Over time your style will develop.
Remember, quality over quantity. Serve your readers with well thought out, well-written blog posts. Include photos to give your readers more inspiration and to break up the text.
Get Comfy with Social Media
Social media is a beast and it will burn you out if you try to be everywhere while building your blog. I suggest starting with two to three channels that you already enjoy using. Make sure your handles are the same (or pretty close) to the name of your blog to avoid confusion.
My three favorite social media channels are Facebook, Pinterest, and Instagram. Although, in the past few months I’ve been spending the majority of my time dedicated to Pinterest and Instagram. I blew off Pinterest in the first few months of my blog, and I wish I hadn’t! It has become an amazing source of traffic for my blog! I’ve developed a strategy to Pinterest and I’ve watched my Google Analytics numbers slowly improve! And I just love Instagram, it’s been great for connecting with like-minded travelers and finding great support!
Set up an Email Service
I thought I could run my blog only via social media. But algorithm changes have shown me that the only thing I have control over is my email list. So I’ve been dedicating more time to building my email list. Even if you just want to send out updates to your friends and family, having all of the emails in one place saves time! I started out with MailChimp because it was free, but outgrew that and upgraded to Convertkit which I am currently using. The majority of quality email services integrate seamlessly with WordPress.
7. Learn about Blogging
My educational background is in Sport Sciences and Exercise Physiology. If you need to know anything about the human body – I’m your girl. But SEO and social media make my head spin. So, I’ve invested in a number of courses so I can learn how to put all of my ideas out into the world.
I want to learn from people who are successful in the areas I want to be successful. And, I want to save myself time. I’m a one-woman machine. I write and edit blog posts, create the social media graphics, respond to all comments, take the photos, write the emails, create the products, and I am traveling! There’s only so much time in the day and if someone can teach me how to do something more effectively so I can explore more – then I will pay for that.
Take a Course
These are the courses I’ve found are completely worth the investment
Nomadic Matt’s Super Start Blogging – First of all, Nomadic Matt’s blog was integral in my travel planning. I trust his advice completely. Second of all, his course is reasonably priced, thorough, and HE actually interacts in his facebook group. I’ve paid more for courses and in the person who I paid never interacts in the groups or responds to emails. If you email Matt – which you can do in this course – he will respond to you. Not someone on his team, HIM. That is invaluable!
StructurPinterest for Travel Bloggers (EN) – This is the course that changed the Pinterest game for me. If you want to see how much my traffic has improved since I implemented what I learned in this course, I will happily share them with you. The instructor breaks everything down in simple steps to avoid the overwhelm. I also use Tailwind to schedule my Pinterest posts to save me time!
Instagram – I’ve taken an Instagram course and I wish I’d done my research into other courses prior to doing the one I chose. It wasn’t worth the money – so I won’t recommend it to you. If you know of a good one – I’d love to hear it!
Free Resources
If you’re not in a financial position to invest in a course – I totally get that. I wasn’t in the beginning either. These are my Go-To FREE blogging resources.
Pro Blogger Podcast – Aussie accent and all, every episode is value packed with clearly actionable items to help you grow your blog – for free.
Online Marketing Made Easy – Podcast – Amy Porterfield is my list building go – to. Not sure what list building means? Listen to Amy. Building an email list is key to creating sustainable success – especially if you plan on monetizing – and she breaks it down so well!
Amy Lynn Andrews – I love her blog and her Useletter. She was my go-to blogger when I was getting started. Her articles are incredibly thorough!
This is Just the Beginning
The steps outlined in this blog post are just the beginning. These will get you off the ground. It takes time, consistent effort, and an insane amount of patience to grow your blog into a sustainable business. I’ve wanted to give up a number of times and throw my laptop into the ocean once or twice – but I’m glad I didn’t. Sharing your story is one of the most powerful things you can do in this world. Other people will connect with it and they will want to read your take on the world. So create a plan, know who your reader is, develop a monetization strategy, and set goals. It may not happen overnight, but if you stick with it, provide people with quality content and are a legit person, it can happen for you.
Good Luck!
As a side note – many of the links are my referral links. This means, at no additional cost to you, I will earn a commission if you make a purchase. I only link to products I use and find incredibly useful. It helps me keep this blog up and running without cluttering it with ads!